Overview
Live data feed provides you with a streaming, chronological, real-time view of all your raw and labeled Heap events. This is a great tool for QAing that your Heap SDK is installed correctly and that your event labels are working properly.
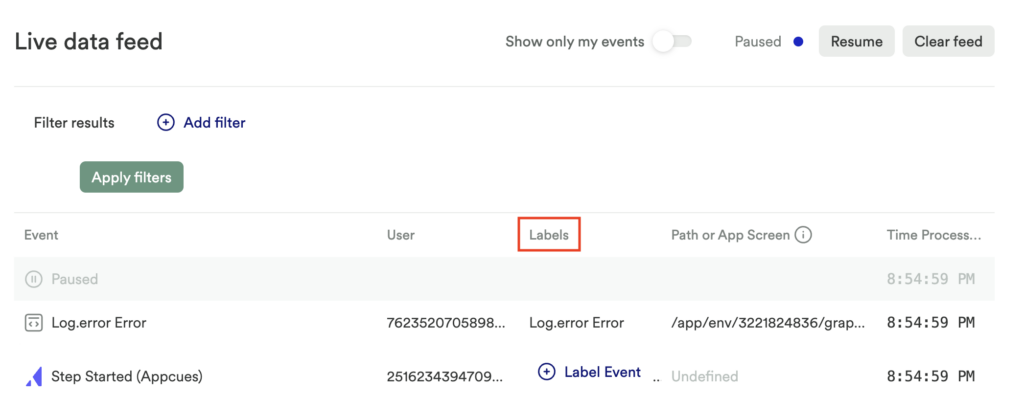
To see your live data feed, click Live data feed under Data in the main nav. When you first launch the page, you’ll see events start to scroll automatically. You can pause and unpause the live stream by clicking the Pause/Resume button.
You can also clear your feed for testing by clicking the Clear Feed button.
Toggling Show only my events limits the events shown by two specific properties: browser and IP address. If other users have the same combination of IP address and browser details as you—which can happen, especially in a corporate setting where browsers are managed by IT and everyone is on the same physical network—their data will also appear in Live data feed when this toggle is switched on. The best workaround is to filter results by your identity or User ID.

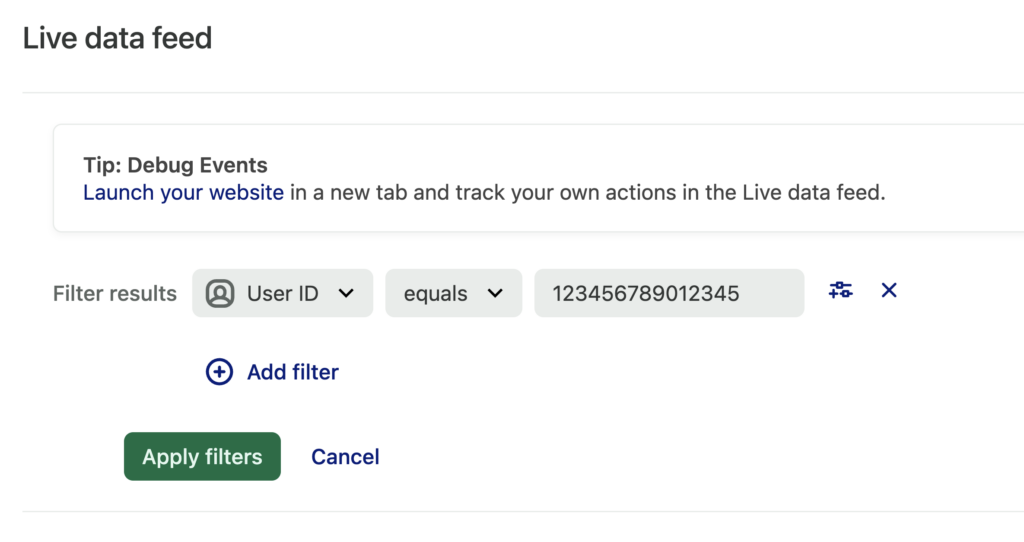
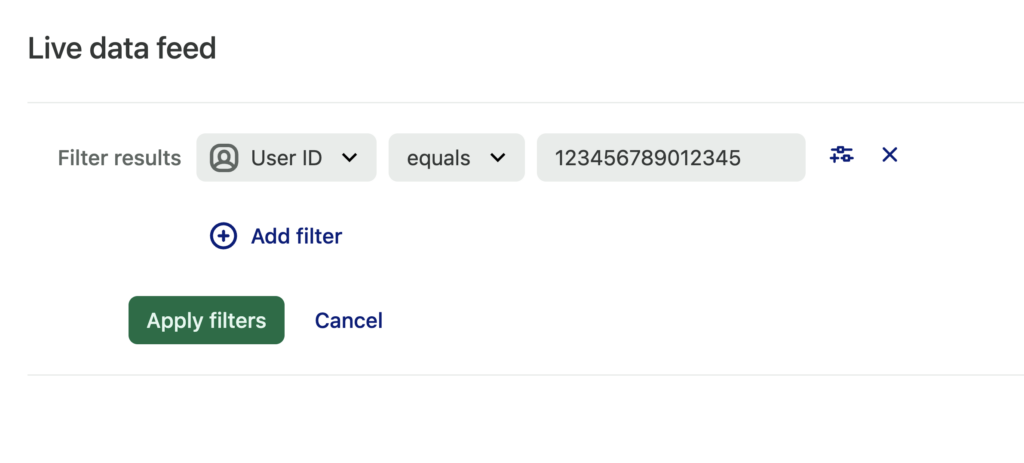
As a workaround for filtering for your events, you can filter on your own Heap user ID, found by typing heap.userId into the developer console while on your website.
If you attempt to use Visual labeling and Live data feed at the same time, the Visual labeling mode will ignore Heap and prevent it from capturing your actions. Accordingly, Live data feed won’t show any actions either. This is to protect your data from getting muddled.
To use Live data feed to debug the events you’ve previously created in visual labeling mode, see the QA Events with Live data feed section below.
Labeling raw events in Live data feed
For each raw event, the Label column will either show the name of a matching virtual event, or provide a button to label the event if the event is not yet labeled.
To label new events from Live data feed:
- Click on the row of the raw event that you want to label to open up the Event Detail Pane
- Click Label event
- Name your event and set it as a personal or shared event
- Add your event to a Category; you can also add a source, apply filters, and set snapshot categories
- Click Label event to save your new event
Labeling mobile events
Some caveats for labeling mobile events:
- You may have a fast-paced stream of mobile events, which can make it difficult to pick out the one you want to label. If this is the case, we recommend setting up your live data feed so that you can complete the event you are trying to label and watch it appear in the feed. That way, you can confirm that you are labeling the correct event.
- We recommend using an emulator or a copy of your app on a device you have access to when labeling events via the live data feed.
Labeling a mobile view screen event
When labeling a view screen event, this will appear as a ViewController (iOS) or Activity (Android) event in your live data feed.
When reviewing your live data feed to spot the event, you can check the title of the raw event for these terms, or check the criteria of the event when labeling it. The View screen action will be autofilled as part of the event criteria.
After you click Label event, In the event criteria, you’ll want to check that the View screen action and the ViewController (iOS) or Activity (Android) property is autofilled, as in the image below.

Labeling a mobile touch event
To verify that the touch event you’re labeling is the correct one, we recommend checking the following properties in the event details:
- Target Text
- Title
- accessibilityLabel OR accessibilityIdentifier (if you have set these properties)
These properties will appear as seen in the example below, where a user clicked a button titled ‘Simple’ on a screen titled ‘Alert Controllers’.

When labeling this event from live data feed, you may need to add these properties as filter to your event to make sure the event is only counted when the specific element is touched. To do so, you’ll need to manually copy-paste the property names and values into your new event as filters. You can do so on the event details page after clicking Label event from live data feed.
Filtering events
You can filter raw events by User ID, or by Session, Pageview, and Event properties. To add a filter, click the + Add filter button, choose the property, operator, and value you want to filter on, then click Apply Filters to start viewing the filtered live event stream.
Filtering by device type can be helpful to make sure your mobile Heap SDK is implemented correctly.
Filtering by event properties can be helpful for understanding if the CSS selector you are using for your event is working properly (i.e. that it’s not too specific or too broad).
QA events and snapshots with Live data feed
To QA event labels using Live data feed:
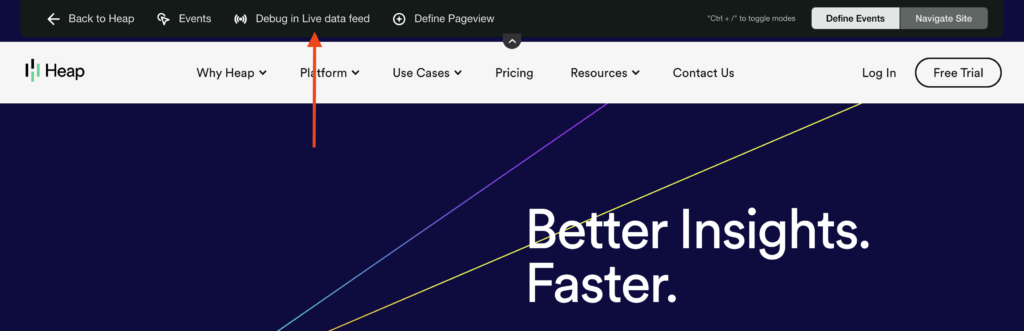
1. Navigate to the Visual labeling page, then from the page you want to QA events for, click the Debug in Live data feed button at the top. This will take you to Live data feed and automatically filter based on actions taken only on your computer.
2. Click Launch your website. This takes you to a new tab where you can click around your site, and only the events coming from your machine will appear in live data feed.
3. On this page, take the action corresponding to the event that you just created. In this example, we are tracking clicks on the Free Trial button in our header.
4. Confirm in live data feed that the name of the event you just created appears under the Label column.
5. If you’ve added a snapshot to this event, click into the event to see the properties to make sure you see the values that you’d expect. You can do so by clicking the View All Properties button at the bottom of the event details pane.
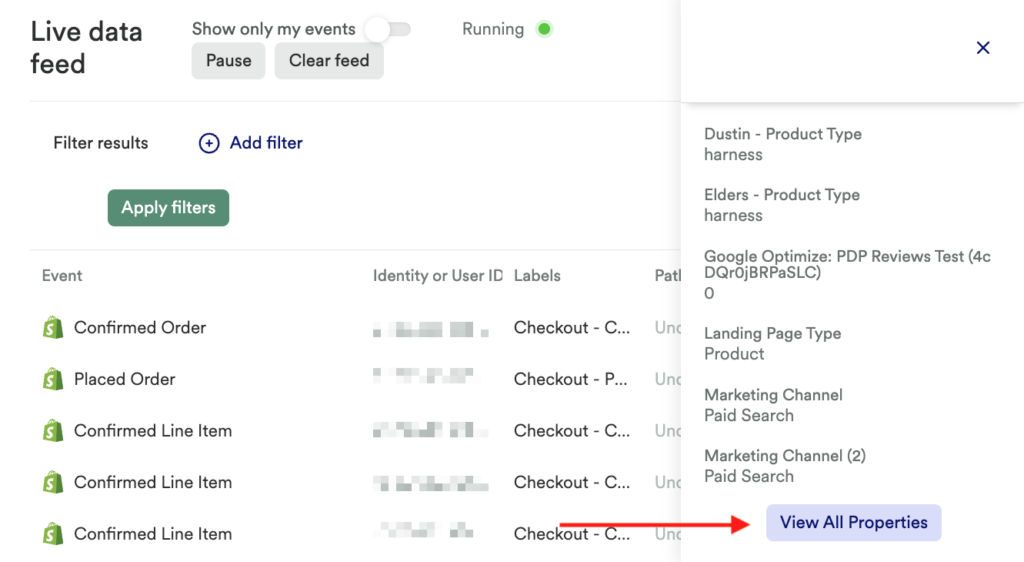
A pop-up will appear listing all of the properties for this event. Check if your snapshot is listed, and if so, what data is being populated.
6. As an additional QA, we recommend taking some actions that you want to make sure do not get counted as your event. Confirm that these actions do not show up with your event name under the Label column.
If you are using IP exclusions and filtering out events from your office’s IP address range, you will not see live events when you filter for your User ID from your office.
One workaround to this is to connect to a Virtual Private Network using an IP address outside your company’s IP address range, then repeat the steps above.
Filtering for mobile sessions in Live data feed
To filter for mobile sessions in live data feed, complete these steps:
- Geolocation (Region and City)
- IP address (even better than geolocation)
- Device information (Platform and Device Type)
Source will be either Android or iOS (filtering this way is NOT advised when using live data feed for a React Native installation).
React native
For apps on SDK versions below 0.9.0, you can label React Native events in live data feed.
To use live data feed effectively for labeling events, you’ll need to identify your own User ID and use that as a filter to isolate events that you are triggering. The easiest way to find your User ID is to follow the instructions above for QAing events from Live data feed (Data > Live data feed).
Once events are filtered appropriately, you can click around in a simulator/emulator or on a live device. Events may take up to 15 seconds to propagate to the Heap app, so it’s helpful to be deliberate and patient to avoid generating too many events at a time.
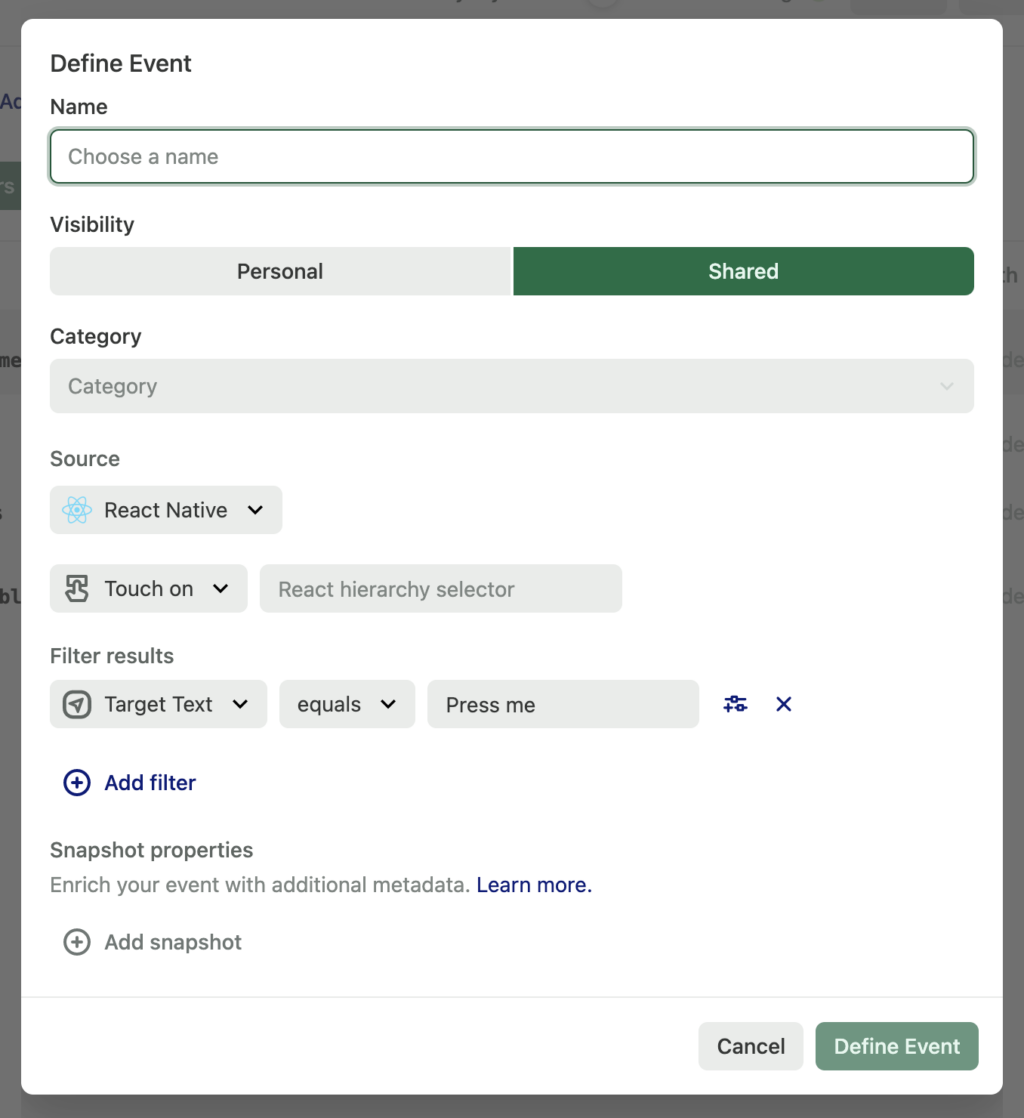
Live data feed enables you to see the set of properties associated with a particular event (except for the hierarchy) and to identify defining characteristics of that event. For example, when you select the Touch on Press me event, click View All Properties and scroll down, you’ll see a captured Target Text property with the text “Press me”.
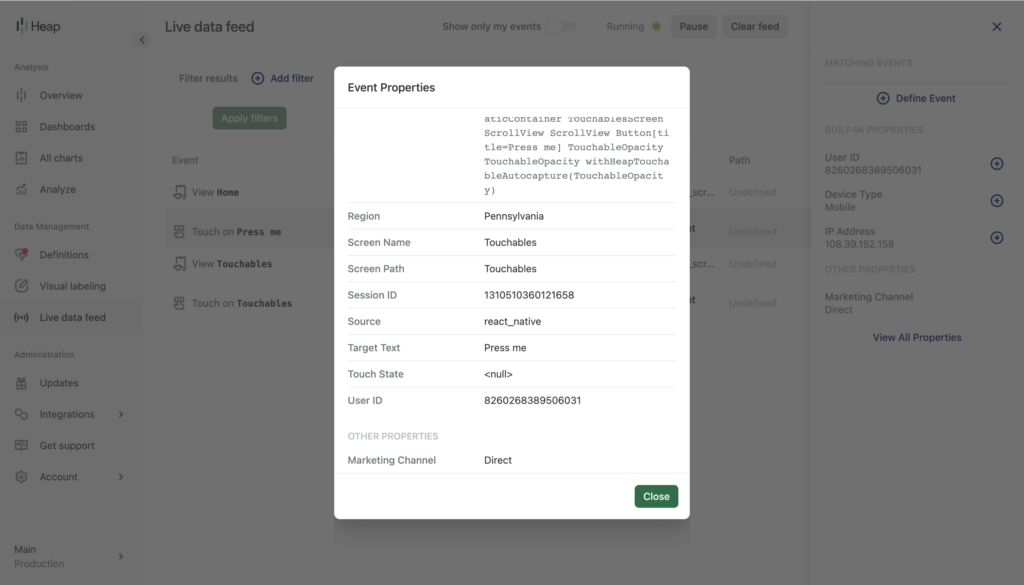
To label a new event with this event property, Click the Label Event button. The filters for Target Text equals “Press me” will be pre-populated for your event. Simply enter a name and click Label new event to save it.
Information about how to use hierarchies in event labels is available in Events overview.