Overview
Zapier allows you to integrate Heap with hundreds of applications and tools. This article covers how to set up Heap to be a Trigger or Action on Zapier.
Requirements
Before setting up Heap for Zapier, you must first sign up for a Zapier account and walk through the process to set up webhook access. You should also already have an account set up for the third party tool to generate the API key needed for the webhook to work.
Heap as a Trigger
You can use Zapier as an intermediary to pass along data sent from Heap to a third party via webhooks. This enables you to share Heap data in ways that are useful for your team.
To retrieve data from Heap to send to your third party tool, you will need to create a webhook in the Heap UI that points to Zapier, have Zapier catch that webhook as the trigger, and zap the data to your third party.
Webhooks must be enabled in your Heap account to support this integration. Please contact support@heap.io for assistance.
Zapier Setup
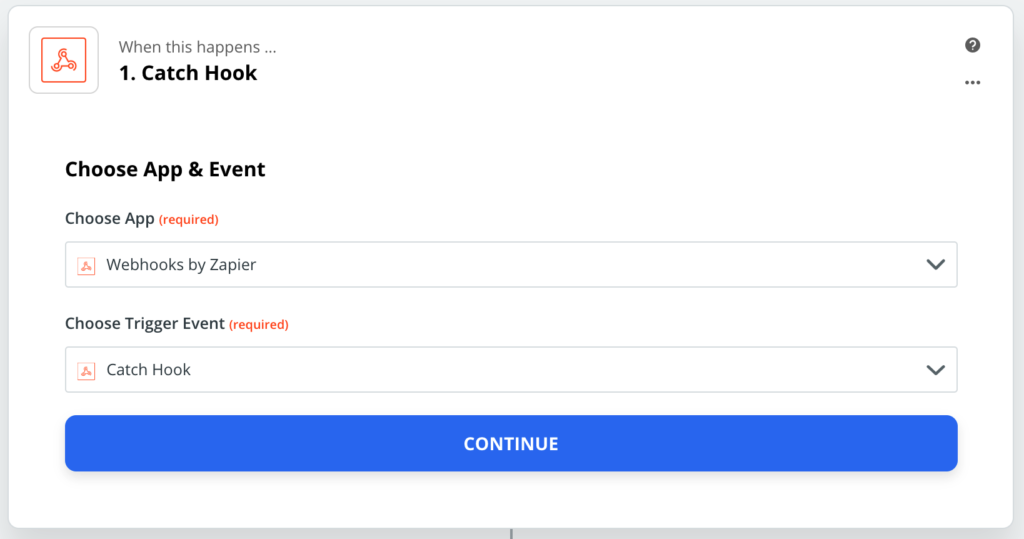
In this step, we will set up the Zapier trigger to catch the Heap Webhook. First, choose Webhooks as the trigger app and the Catch Hook trigger event.
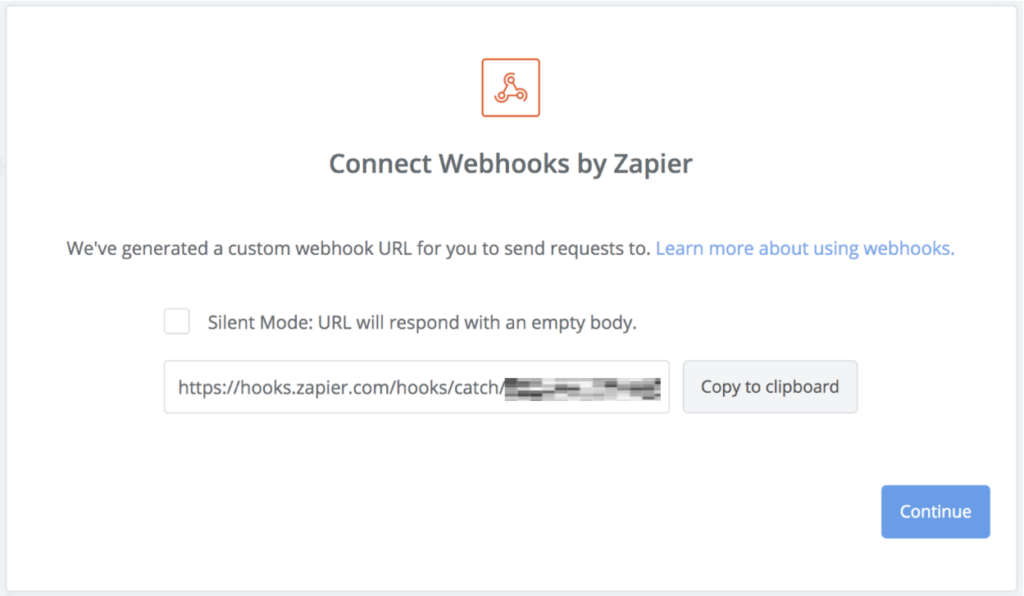
Clicking Continue will generate a Custom Webhook URL. We’ll be setting up our Heap webhook to send data to this URL, so save this URL as we move over to Heap.
Heap Setup
In Heap, navigate to Integrations > Directory > Webhooks and click the +New Webhook button. The following page will appear:
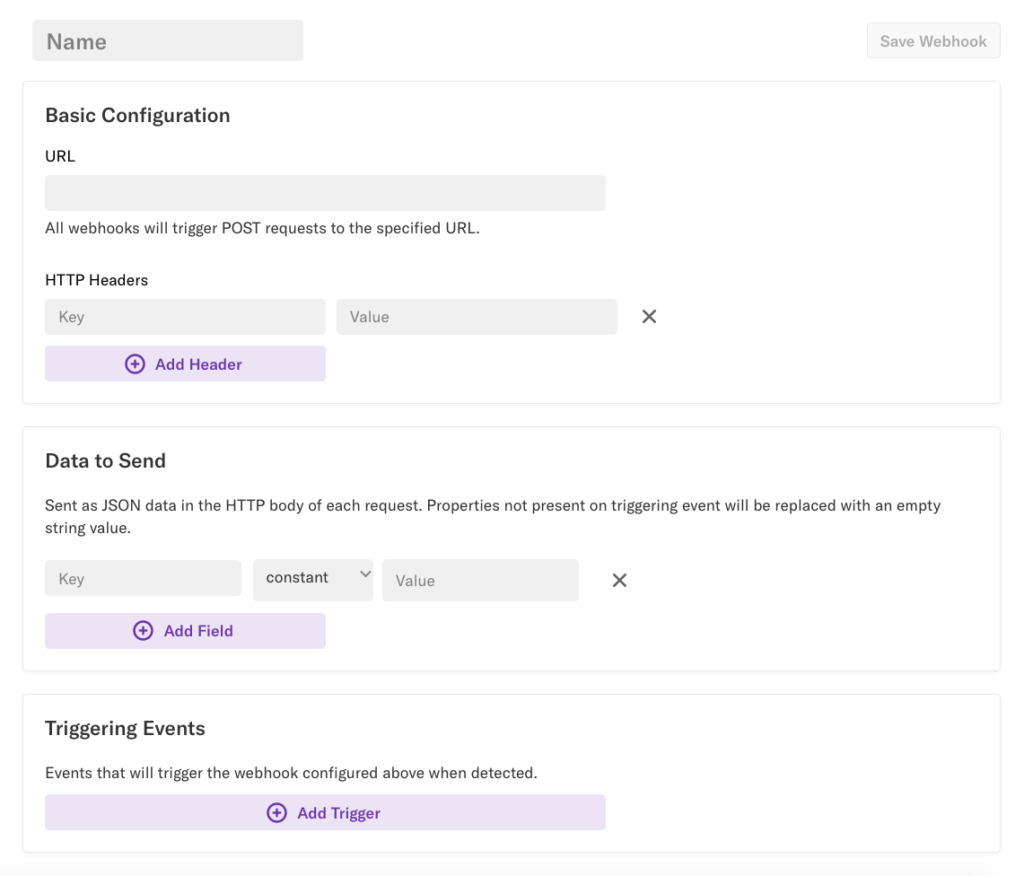
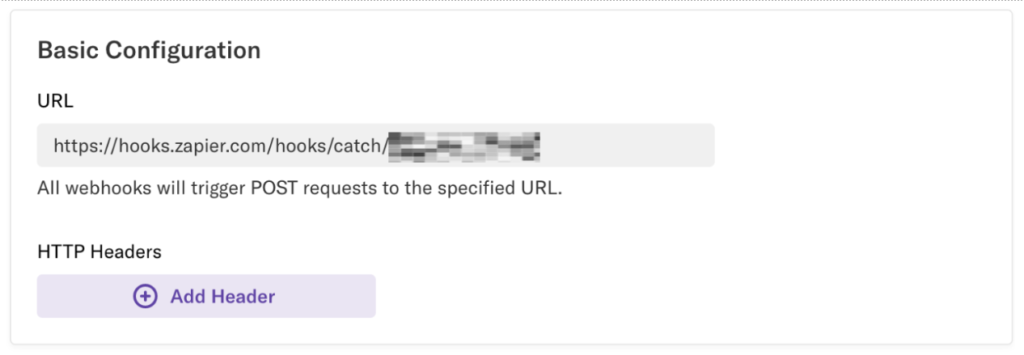
Under Basic Configuration, paste the URL from Zapier in the URL field and delete any HTTP Headers listed.
You can customize the data you are sending from Heap by adding them under the Data to Send field. You can send whatever values you want, regardless of whether it is a constant, a property, or a nested value. In this example, we will name the data user_identity set to a constant of this email address.
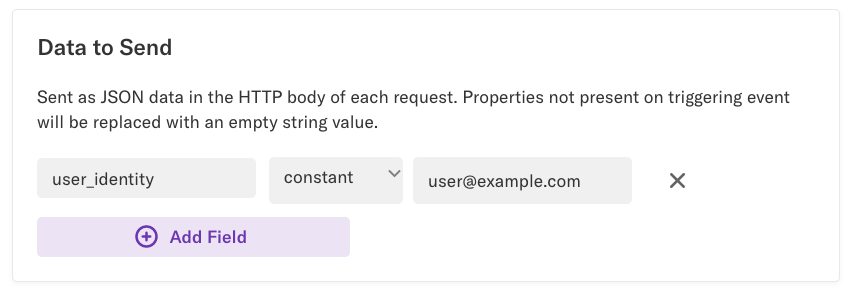
Under Triggering Events, you can choose any event you want to trigger the webhook. In this example, we chose this pageview event and the constant data to send so that we can control the data that the webhook is sending.

Click Save Webhook to get started on testing!
Testing your Webhook
Back in Zapier, click on Test & Review. You should see 3 little dots moving on the screen. This means it is waiting for data from Heap.

To test the webhook, trigger the event you set up as your Triggering Events on Heap. This will trigger Heap to fire a webhook to Zapier. Once Zapier gets catches the Heap webhook, it will tell you the data is captured in the sample collected.
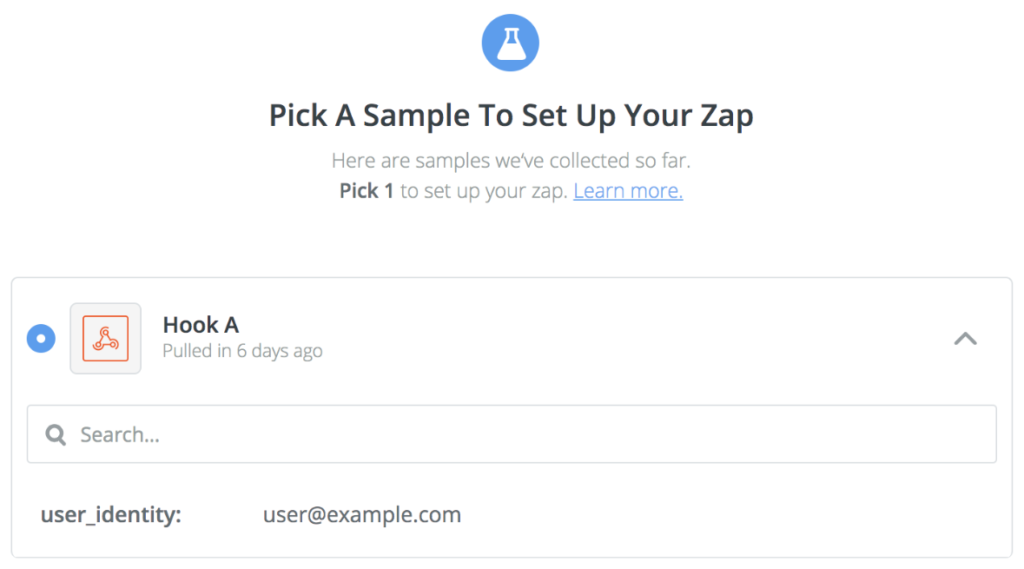
Your Heap data has been sent to Zapier!
Heap as an Action
You can use Zapier to track new events and add user properties whenever a Zapier Trigger occurs. This allows you to send data to Heap from sources that aren’t officially supported by Heap.
To use Heap as a Zapier Action, we’ll be using the Webhooks by Zapier app to send server-side API calls to Heap. Start off by selecting the Webhooks by Zapier action app and the POST action event.
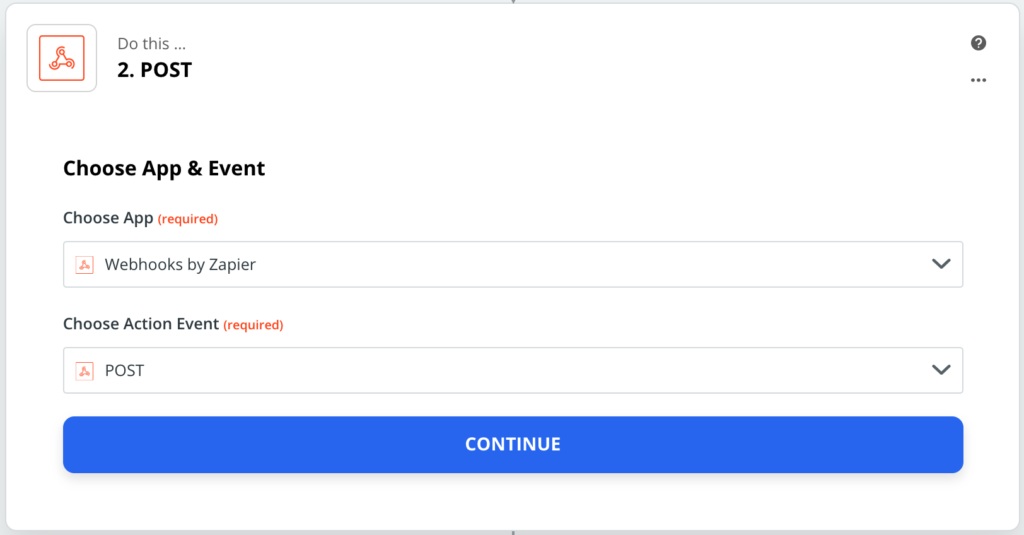
The following sections will cover how to set up your Zapier Action for tracking events or adding new user properties.
Track Events
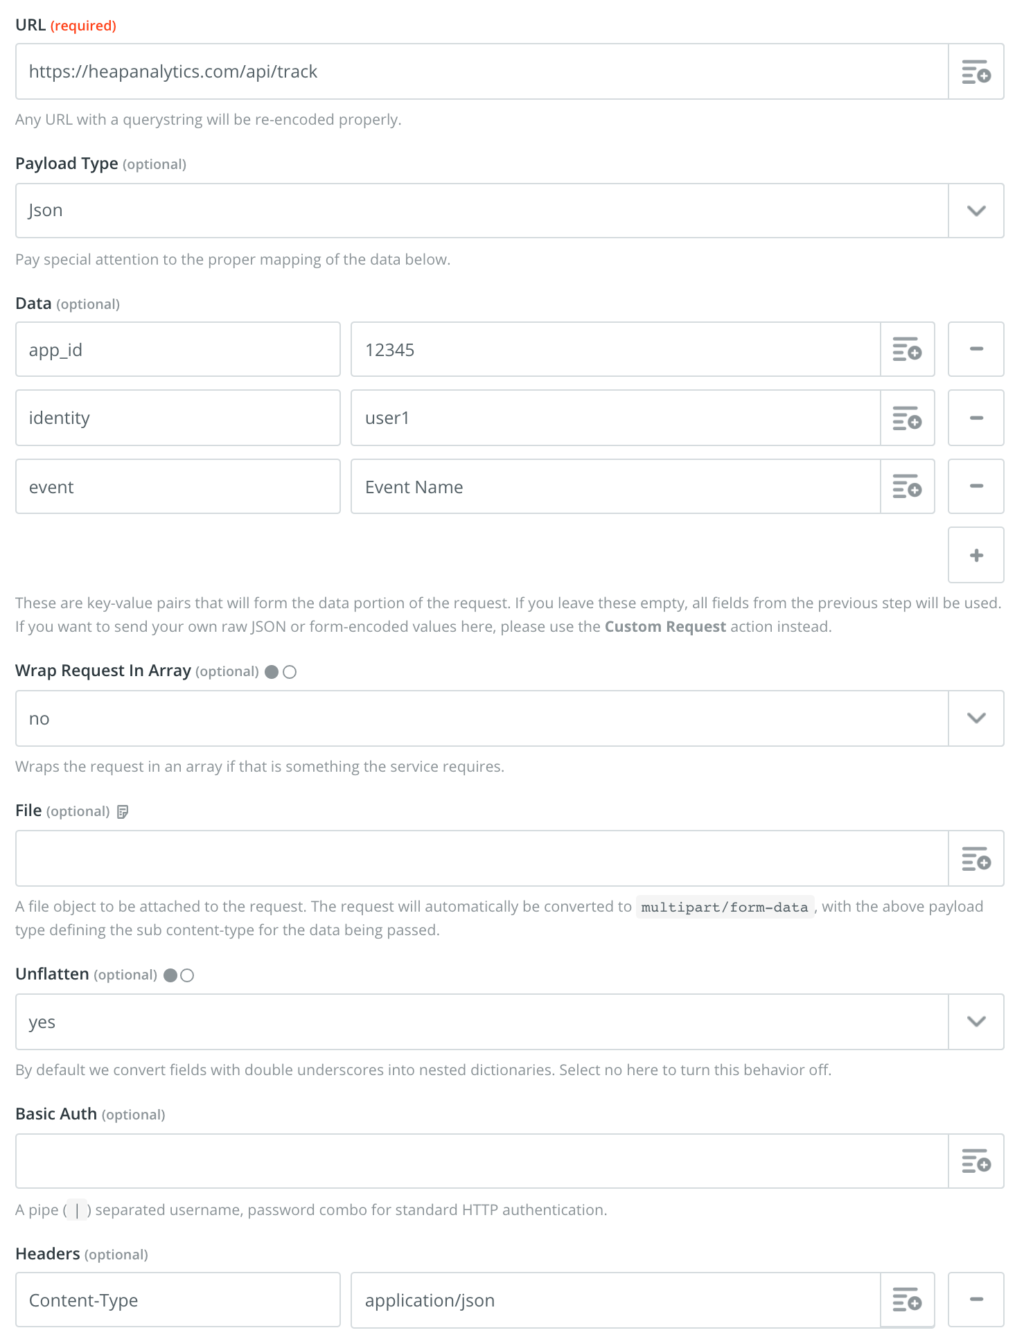
Customize your POST action event with the following required fields:
- URL: https://heapanalytics.com/api/track
- Payload Type:
Json - Data
- app_id: The Heap environment ID you want to send events to
- identity: The user’s identity (this value can come from another Zapier step)
- event: The event name you want to track (this value can come from another Zapier step)
- Wrap Request in Array: No
- Unflatten: Yes
- Headers
- Content-Type: application/json
Properties
To attach a property to this event, add an entry for Data where the key is your property name prepended with properties__ and the value is the property value.
For example, if you wanted to add a Subject property equal to “Hello!”, you would add the following entry to the Data section:

Add User Properties
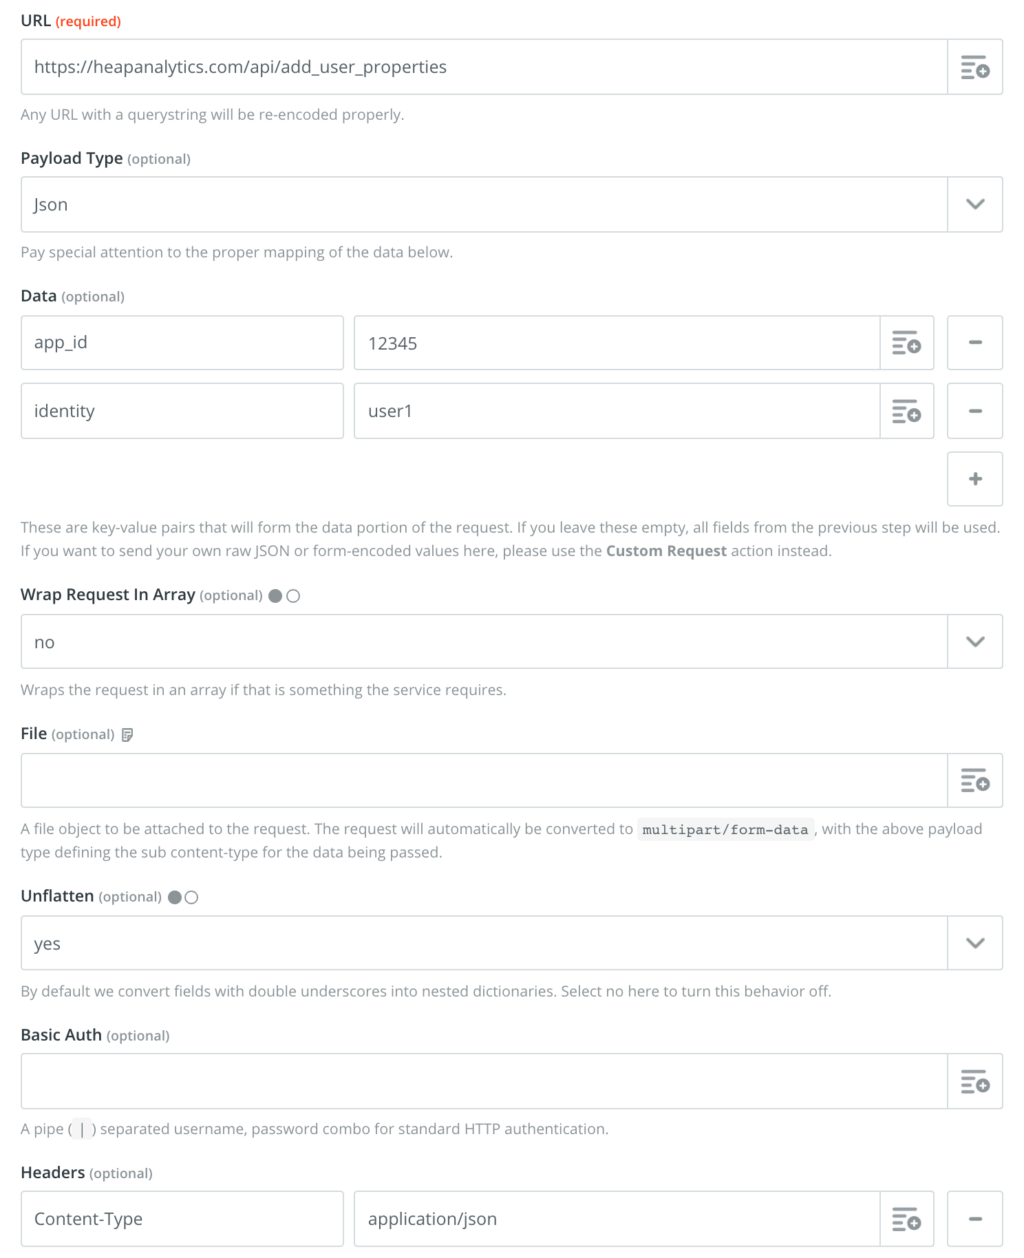
Customize your POST action event with the following required fields:
- URL: https://heapanalytics.com/api/add_user_properties
- Payload Type: Json
- Data
- app_id: The Heap environment ID you want to send events to
- identity: The user’s identity (this value can come from another Zapier step)
- Wrap Request in Array: No
- Unflatten: Yes
- Headers
- Content-Type: application/json
Properties
To attach a property to this event, add an entry for Data where the key is your property name prepended with properties__ and the value is the property value.
For example, if you wanted to add an Account property equal to “Heap”, you would add the following entry to the Data section:

For questions about this integration, reach out to support@heap.io.