Overview
The Looker Data Import Integration enables you to sync user and account properties from Looker into Heap as a one-time or recurring send. Using this integration, you can do the following:
- Sync properties from other third party systems into Heap to slice key funnels, such as Salesforce user properties (ex. lifetime purchase history, income, employer)
- Sync segmentation data calculated by your data science team into Heap to enrich your analysis with a single view of your users, such as LTV segmentation
- Sync backend product flags from your product database to understand adoption, such as which users or accounts have turned on a feature or purchased a product
Setup
You’ll need to get the Action URL and Authorization Token from Heap before starting setup. Reach out to your Customer Success Manager or Support to get these details.
Join Key Required
You need a user property to match data across the same user in Heap and this source. This property can be set to identity or any custom user property in Heap.
Make sure that the value of the property you choose is unique to each user. For example, email address is a typical join key because each user should have their own unique email address. You can use any two IDs that match.
You will need to use Heap’s APIs if you don’t have this kind of property set up or if you are not currently sending email addresses into Heap. Learn more about attaching custom data to users via Heap’s API here.
Need help? Please post in Community or contact us via the Get support page in Heap.
This process will take ~5 minutes and require Looker admin access. Setup steps are as follows:
- Step 1: Log into Heap and navigate to Integrations > Directory > Looker Data Import and select Set Up. Follow the in-app prompts to enable the integration in Heap.
- Step 2: In your Looker account, navigate to the Action Hub settings page in your Looker admin console.
- Step 3: Create a new Action Hub by selecting Add Action Hub at the bottom of the page.
- Step 4: Input the Heap-provided action URL and click Add Action Hub
- Step 5: When it prompts you for the Authorization Token, enter the token provided by Heap
That’s it! To use the integration, see the next section.
Usage
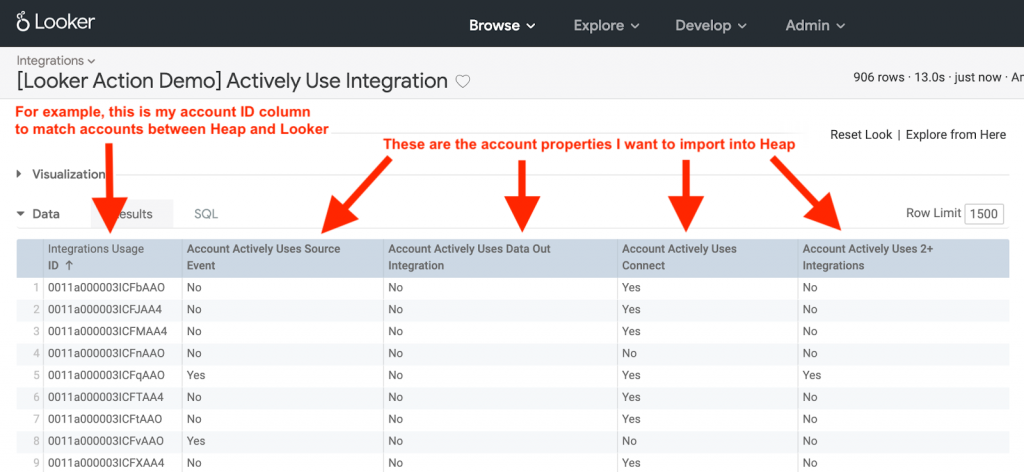
Step 1: Build a look with a join key column and property columns. Heap will use the values in this column to match users and accounts in Heap. This should match the account ID or user ID depending on whether you’re importing account or user properties.

Set up the elements of the look as follows:
- Join key: check in Heap (bottom of the page here) if you’re unsure what ID to use as your join key.
- Properties:
- The property name in Heap will match the Looker column name. If you want to rename the columns, you can use custom dimensions.
- There will be one Heap property for each column in the chart or Look. Remove columns that you don’t want to sync into Heap.
Step 2: Select send or schedule to initiate the sync.
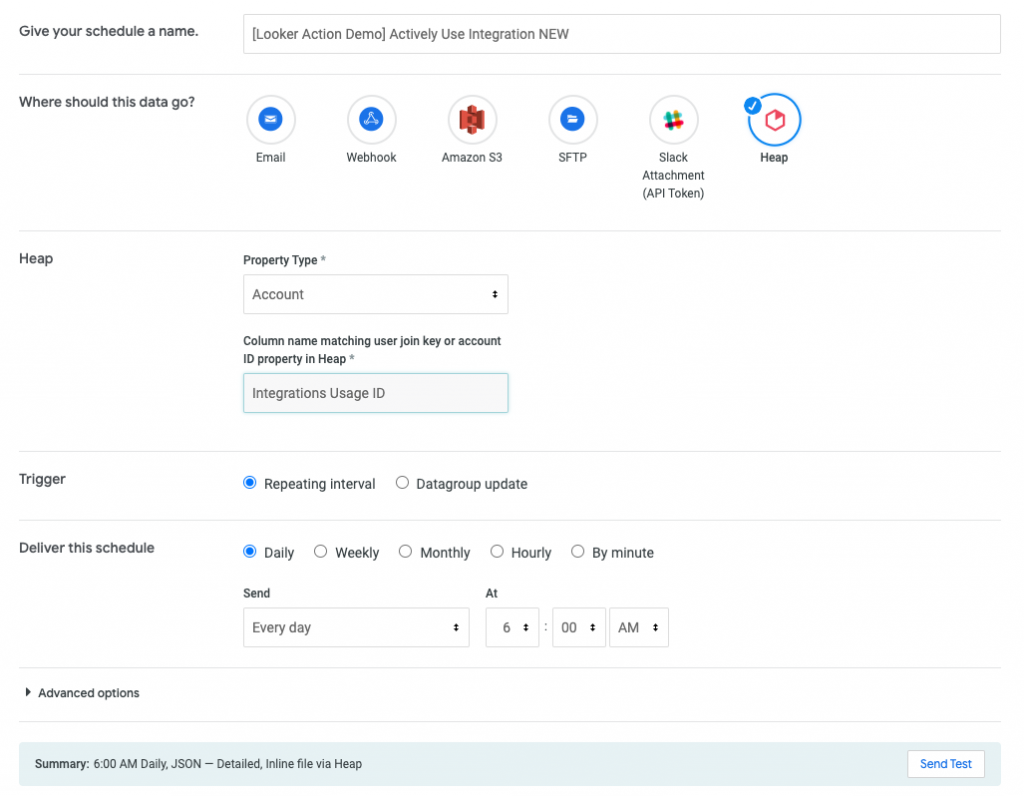
In the pop-up that appears, select the following options:
- Select Heap under “Where should this data go?”.
- Input your Heap Environment ID where you want to import this data
- Select Account or User under “Property Type” based on whether you’re sending account properties or user properties.
- Input the Looker column name corresponding to the Heap join key (input the full column name as shown in the “Data Results” tab — see example below).
- Set a sync schedule under the “Deliver this schedule” section based on your reporting needs. Every delivery will send all rows into Heap, and Heap will override existing values in synced properties.
- If your result set is larger than what’s displayed in the table (default: 500 rows) and you want to send the full set, set the limit (under “advanced options”) to “All Results”
Example – Looker column name

If you configure the send incorrectly, you’ll receive an email from Looker, so be on the lookout for that!

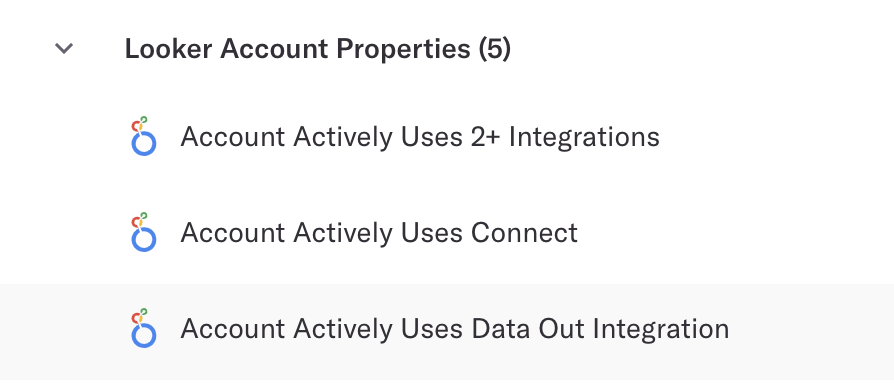
Step 4: Navigate to Data > Properties to see your new Looker properties in Heap. They’ll show up within a few minutes after the send is set.
