If you’re new to properties, we recommend reading Properties overview before digging into this doc.
Some popular use cases for labeled properties include:
- Create custom marketing channels
- Aggregate unique property values into larger groupings
- Merge, re-name, or clean up existing properties
1,024 Character Limit for Heap Connect Sync
If you plan on using Heap Connect to sync labeled properties, note that there is a 1024 character limit in the data schema. For this reason, we recommend keeping all labeled property values below 1024 characters.
Creating a new labeled property
You can create new labeled properties in Heap from the following places:
- The Labeled events page
- The Properties (event & user) page
- Via property suggestions in the visual labeling interface
To create a new labeled property in Heap, click the Label event or property button in the top right corner of the page and select Property. This will launch the property creator, as seen below.
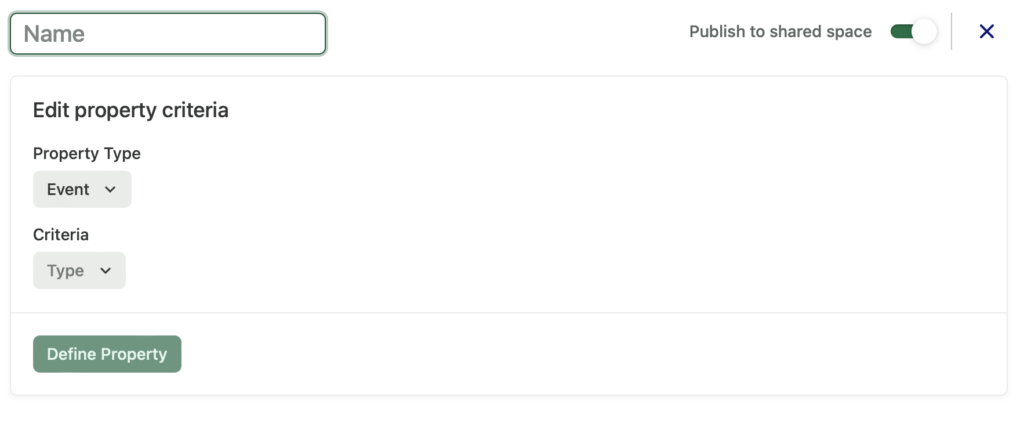
A property label consists of the following components:
- The property name
- The property type (event or user) – once specified, you’ll be restricted to only using properties of the same type within each case statement
- The property criteria
Team members in the Read-Only and Consumer role can only create personal labeled properties. Analysts, Architects, and Admins can create shared labeled properties using the visibility toggle in the top-right.

Limitations
Labeled properties have the following limitations:
- They cannot be used in event labels
- They cannot be used in segment labels
- In Heap Connect, labeled properties sync to Redshift and S3 only
Labeled property criteria
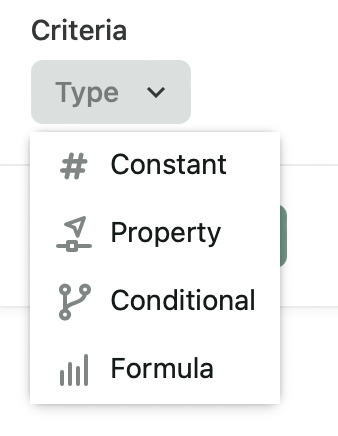
When creating a labeled property, you’ll need to select from the top-level drop-down with four options. We’ll discuss when to use each option below:
Constant
Constants can be used throughout labeled properties in various use cases, including:
- Multiplying a Stripe property (which is measured in cents) by 100 to get the amount in dollars
- Labelling a conditional case as “High Value Customers”
- Using regular expression replace to redact customer ids in the url and replace them with “Redacted”
Property
With property, you can select any non-labeled property in your account that matches the corresponding type (event or user) that you selected above. Properties can be used throughout labeled properties in various use cases, including:
- Using extracting a regular expression to extract a section of the url
- Concatenating a user’s country and city to get their full location
- Coalescing multiple UTM properties to select the first one that’s labeled to determine the true source of a conversion
Conditional
As referenced in the name, conditionals are defined by the conditions applied to them. They consist of cases, which are ‘when {condition} is met, set value to {value}’ statements, with optional default values applied, as detailed below.
Cases
A case in a conditional consists of the following components:
- The When clause (the property mapping condition)
- The Set value to a clause (the value populated based on the when condition)
Cases are evaluated in order they are defined. In general, it’s best practice to place cases with more general conditions at the bottom or below cases with more specific conditions to prevent any misclassifications.
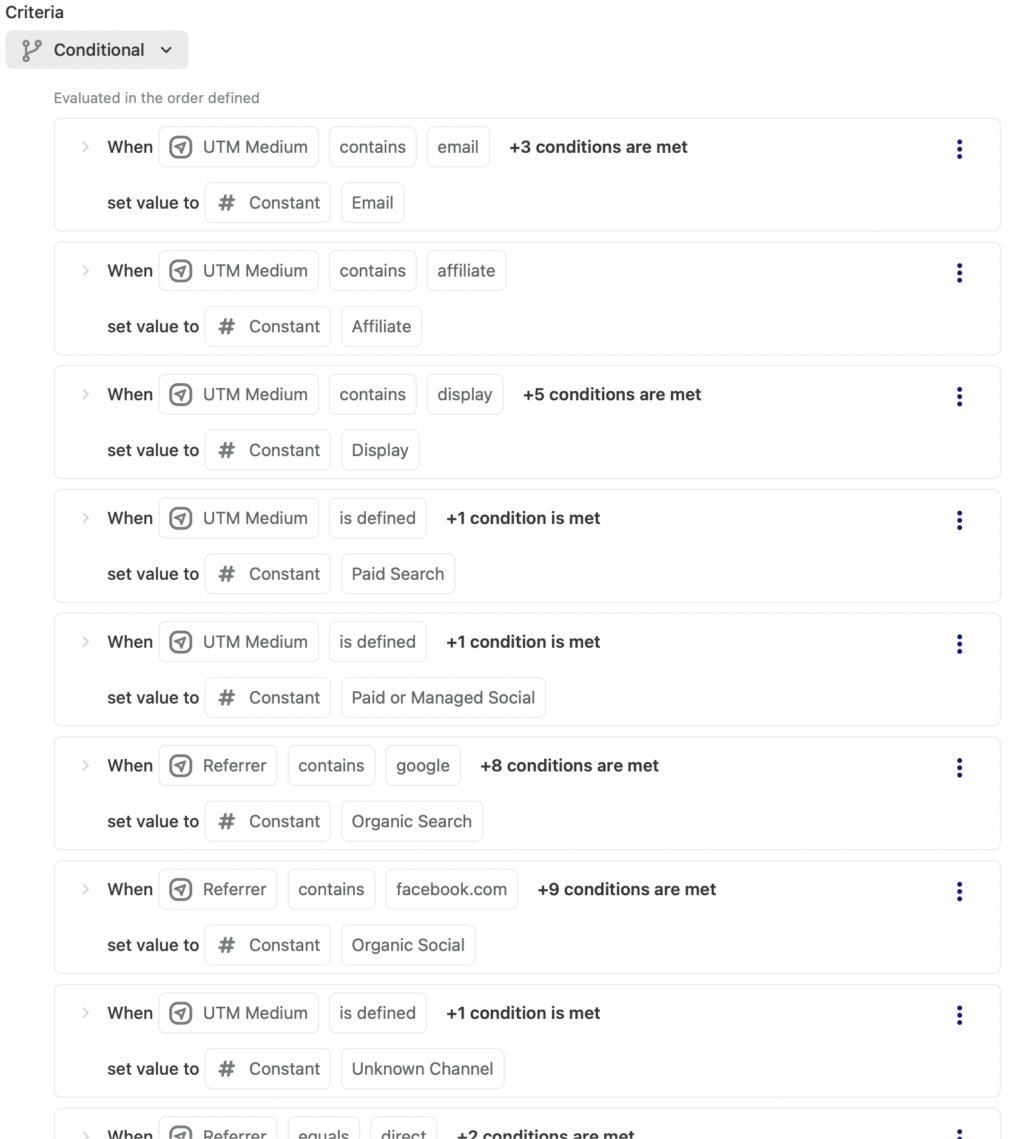
A When clause requires a Property, an Operator, and a Value to formulate a condition. In the example below, this might be when a Referrer contains Google if you’re creating custom marketing channels in Heap.

A set value to clause requires a value to use as the resulting property value when these conditions are met. The most common use case is set this to constant to give a label to the property when these conditions are met.
In the example below, we’ll be setting a value of Search whenever the referrer property contains Google so that we can group by our own channel labels in analysis.

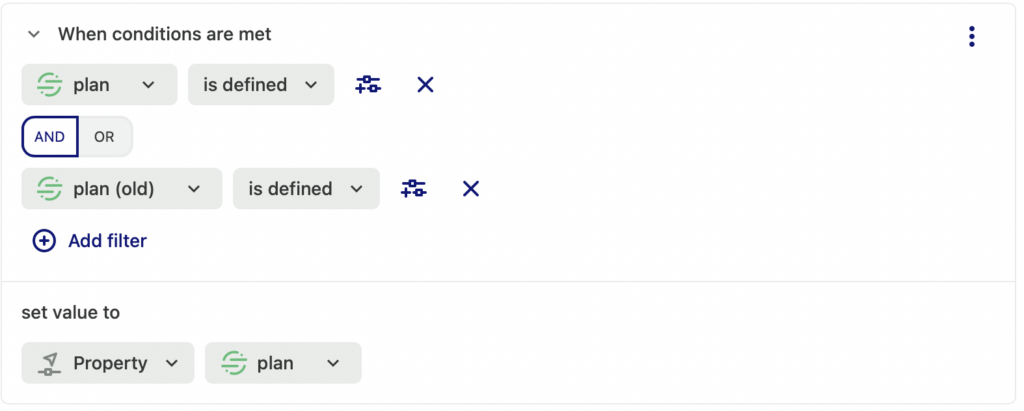
Another common use case is to set the value to property to set the output to the value of another property. You’ll also need to select the property in Heap whose value you’d like to be reflected in the newly created property. In certain cases, you might not have an explicit value you want to map a case to and want to use an existing property value in the newly created property. This is particularly useful when merging property data to organize your account in the example shown below:
When defining a conditional with many different conditions that are similar, you can use the copy button to duplicate the condition, then update the duplicate.

Use Cases
Marketing Channels
Heap has an out-of-the-box ‘Marketing Channel’ property that allows you to review where your visitors came from. You may see ‘Other Referral’ listed there, which means those results don’t fit the criteria for any of the other referral states. Note that Marketing Channel is a generic property. We encourage you to make a copy of this property and customize it to fit your companies attribution model, as described in our example below.
If you’re creating custom marketing channel groupings in Heap, you’ll want to create a Channel property on the event level that specifies several conditions that map to your labels of marketing channels. Once created, you’ll have several conditions in your label that look like the following example:
Aggregating unique values into larger groupings
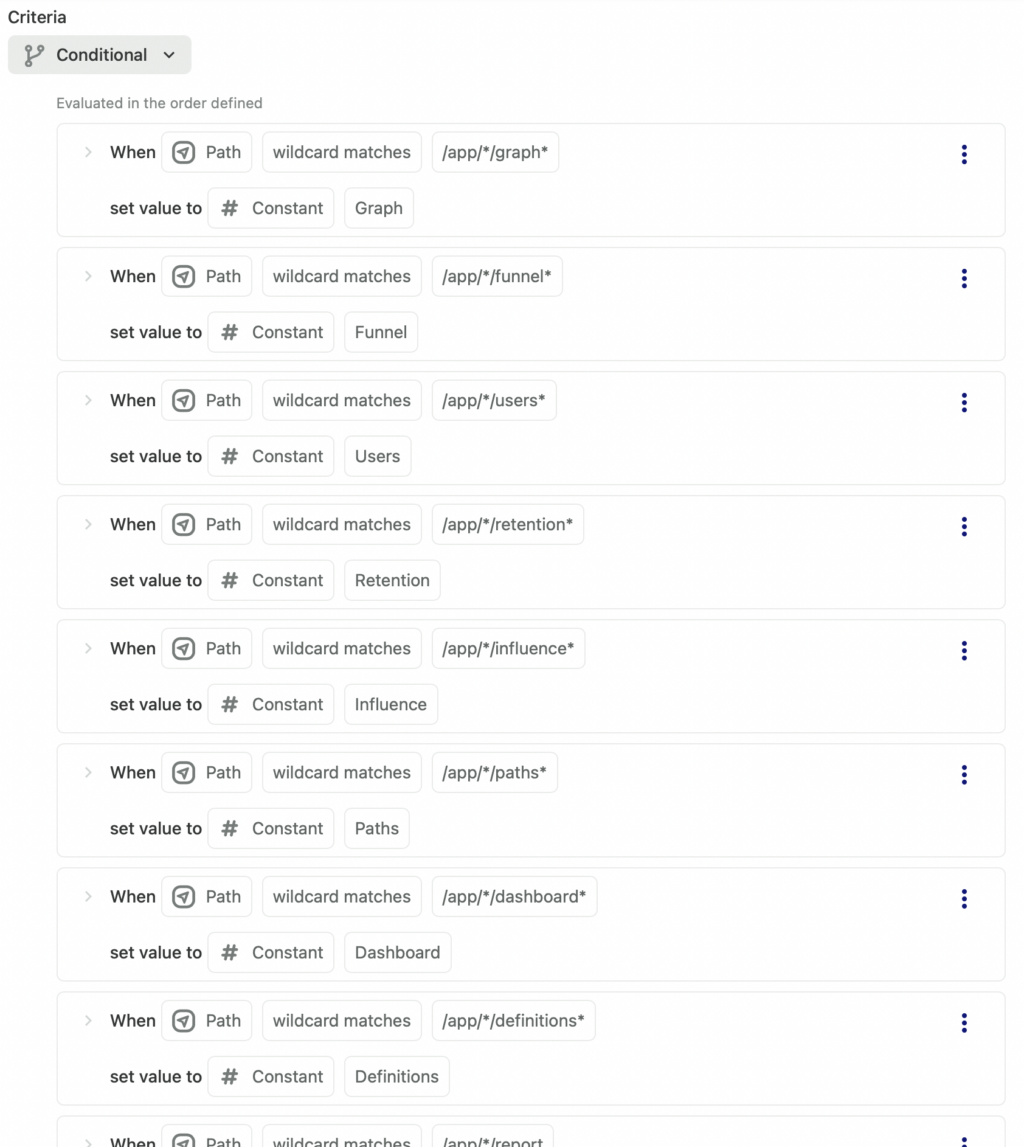
A common use case for labeled properties is to take countless unique values and map them to custom groupings that you can use in analysis. As an example, the Heap application generates unique URLs for each chart. For the ease of analysis, I may want to aggregate these values into custom groupings to understand which analysis modules in Heap users are engaging with based on the URL pattern. To create an Analysis Module property, I would label the following conditions:
Merging, re-naming or cleaning up existing properties
Properties can become messy and unorganized in Heap over time. For example, you may have sent one custom property last year to Heap titled plan but made a change in your implementation to send the property as Plan the following year. You can leverage labeled properties in Heap to merge these values and create a new complete property as a result as shown below.
Formula
Formulas allow you to transform existing properties in some way to make it easier to review that property data. For example, you can use formulas to combine existing street name, city, and state properties into one new address property, or extract part of a URL to capture important parameters.
Formulas consist of a function and arguments to that function. The arguments can be autocaptured or custom properties, some constant text, or nested formulas up to a certain depth. The initial functions we support are:
- Convert to uppercase
- Convert to lowercase
- Concatenate (combine two values into one)
- Coalesce (take the first non-null value of two values)
- Extract using Regular Expression (use Regex to pull out part of a value)
- Replace using Regular Expression (use Regex to replace part of a value)
- Add
- Subtract
- Multiply
- Divide
Use Cases
Formulas are extremely customizable based on your app’s data structure and analysis needs. Review the use cases below for examples of how to set up your own formula properties.
Review the use cases below for additional examples of how to set up your own formulas.
Group together different address properties into full address property
You can use formulas to group together different properties to display as one property in analysis. This gives you the flexibility to view data for many different properties grouped together by category.
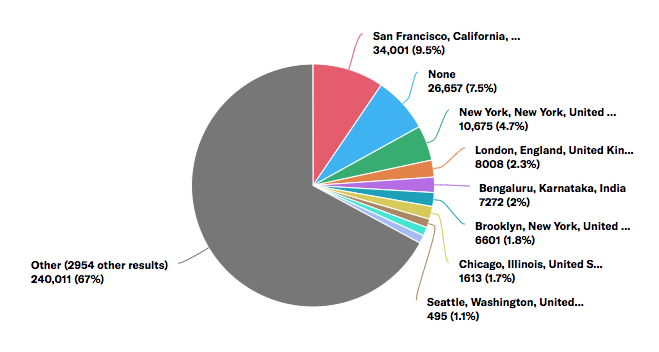
For example, you may want to display your users’ full locations in your analysis results rather than having those bits of location data in different rows.
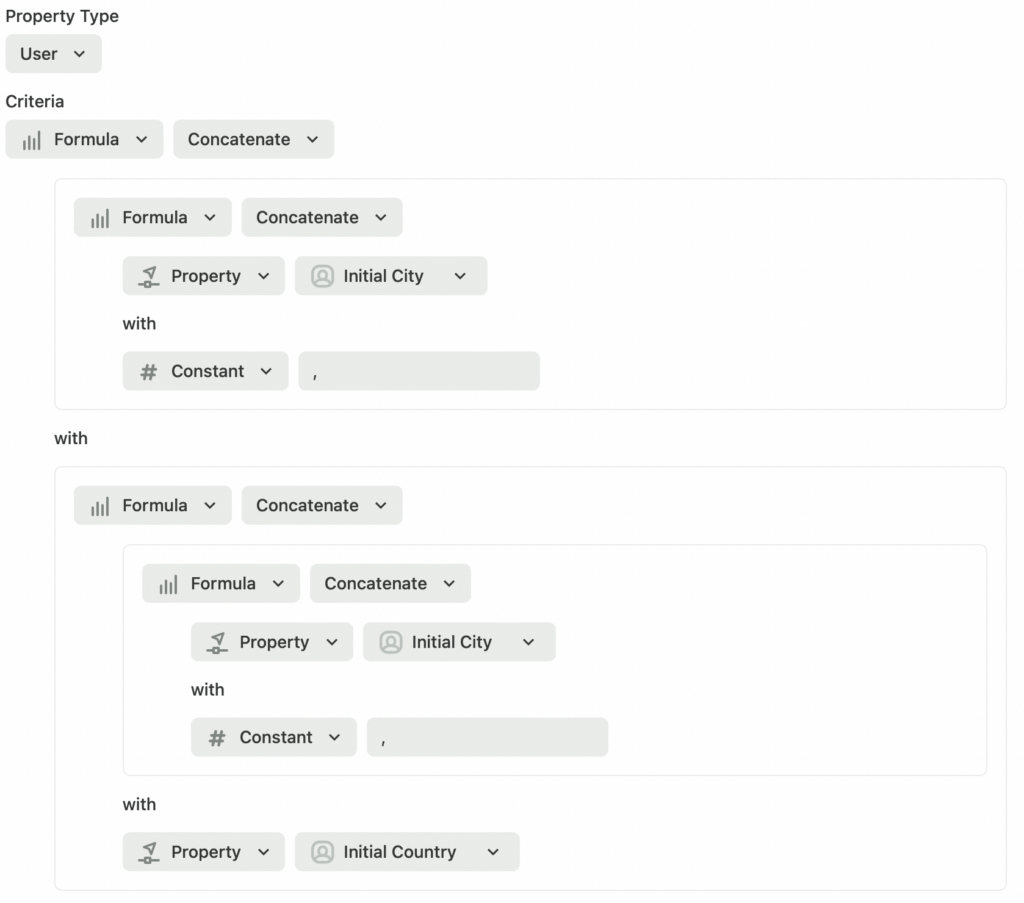
To concatenate different location properties into one, set up a formula with the function Concatenate nested for each property. Depending on how you want your location listed (such as having their zip code added) you may need to nest more properties than this example.
Group together inconsistent casing across browsers & devices
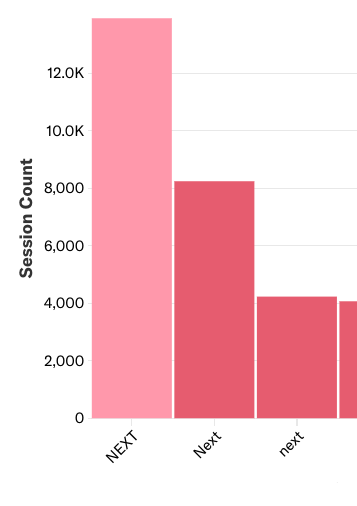
Because browsers and devices tend to vary in how content is displayed, you may find yourself in the situation where a call to action button, such as ‘NEXT’ that is rendered in different cases (Next, NEXT, next) across these different browsers or devices. You can set up a formula to solve this problem without losing historical data or requiring your engineers to update your codebase.
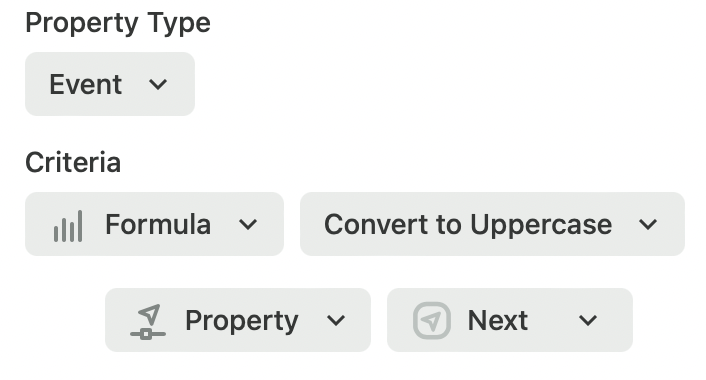
When creating the property, select Convert to Uppercase or Convert to Lowercase based on which way you want it to be cased, then add in the property that needs consistent casing.
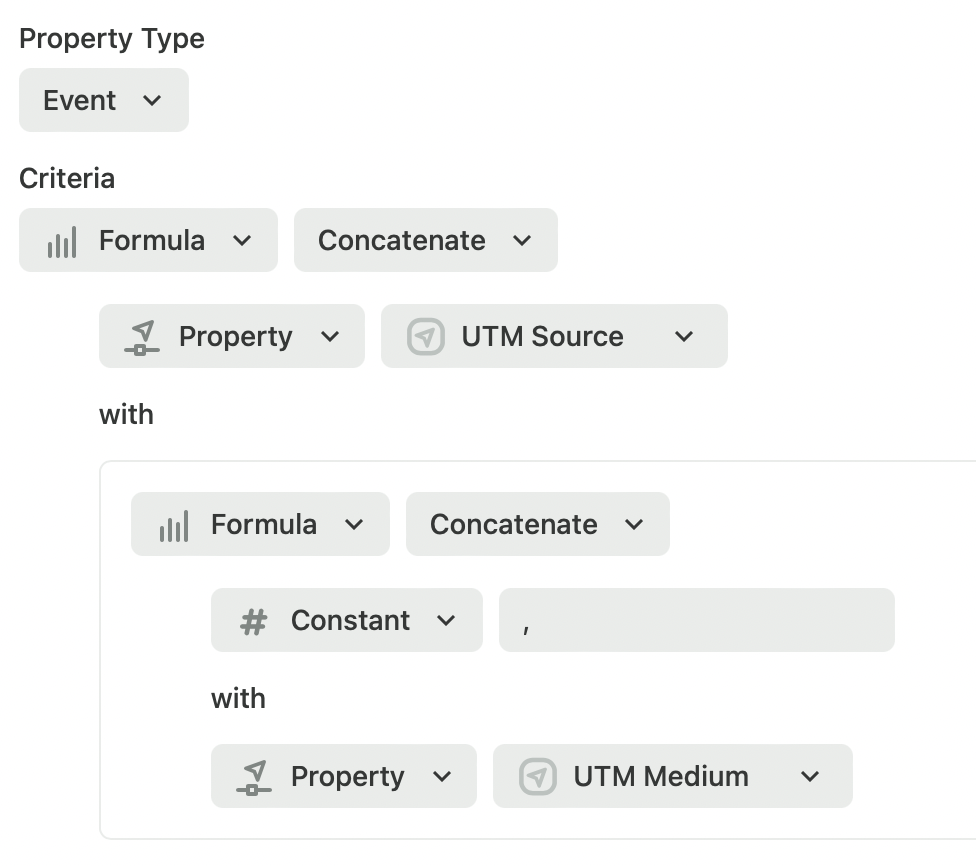
Group together related UTM parameters
You may want to label a property like ‘Source – Medium‘ to combine your Source and Medium properties into one view instead of appearing as two columns when analyzing your data. This also frees you up to view a third property type, such as device.

You can group together these UTM parameters by selecting the Concatenate function, then selecting the two properties.
