Overview
Your Heap account is structured into a series of projects and environments. Projects in Heap can be thought of as blank slates and are completely independent of another. Environments are subsets of projects that share events, segments, and charts, but don’t share any data.
Projects are intended to be used for distinct datasets, whereas environments are intended to be used to separate production data from testing data in a given project. When you sign up for Heap, we’ll automatically create one Main project with two environments: Production and Development.
When to Create New Projects and Environments
In most cases, the single project and two environments that come with Heap by default will be enough for all of your analysis needs. Depending on the variety of products or services you offer, and the variety of different users you support, you may be best served by a setup with additional environments and/or projects.
Single Project & Environment (default)
To analyze user behavior across multiple installations or products, you’ll want to put everything into a single project and (your Production) environment. Use cases for this include:
- You want to track visitor > customer conversion, so you’ll send in all of your marketing site data and in-app data to the same project and environment.
- You have multiple products with overlapping user bases, and you’d like to understand the complete journey of a single user across your entire suite of products, so you send in data from multiple products to the same project and environment. Note that you’ll need a common identifier for users you want to track cross-domain within the same environment.
Using Heap for web and mobile?
If you offer a mobile and web experience, such as an iOS app, Android app, and web app for a single product and want to understand how a single user behaves across each of these apps, we recommend using a single project and environment.
Single Project, Multiple Environments
To keep analysis results separate but share related data points across the environment, you’ll want to set up a single project with multiple environments. Use cases for this include:
- To separate production, development, and staging data. (This is the primary use case for this setup).
- When you have global sites for different countries and want to keep data from each region separate for analysis purposes, but share definitions, charts, and segments across them. The trade-off is that you won’t be able to do global reporting in Heap, though you can use Heap Connect to do this downstream.
Events in the same project will automatically appear across all of the environments in that project, so you don’t have to worry about manually duplicating those events.
Multiple Projects, Multiple Environments
If you have products or systems that are completely unrelated to each other, you’ll want to set up multiple projects and environments to keep your datasets entirely separate. Use cases for this include:
- You have internal and external tools, and you’d like to track engagement with both as separate datasets.
- You have a set of brands or products not related to each other, such as owning multiple, unrelated businesses.
If you structure your account this way, you may want to configure user access and permissions for each project. Learn how to set up project-level permissions in Managing Permissions from the Projects Page.
Projects
Creating New Projects
To create a new project, navigate to the Account > Manage > Projects page.
Click the + Add Project button at the top right corner. Add a name for your new project, then click the Create Project button.
Deleting Projects
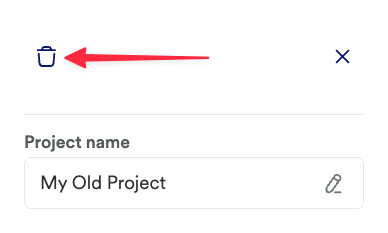
To delete a project, navigate to Account > Manage > Projects, click on the project, and then click on the trashcan icon in the pop-up that opens.
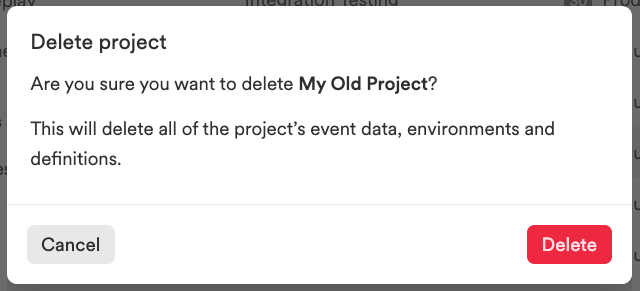
A pop-up will ask to confirm that you want to delete the project. This deletes the project and all the data contained in its environments, so proceed with caution!
Environments
Creating New Environments
Environments are attached to a specific project, and a new environment created with an existing project will carry over existing definitions, as well as charts, from the other environments, though it will contain no data.
To create a new environment, navigate to the Account > Manage > Projects page.
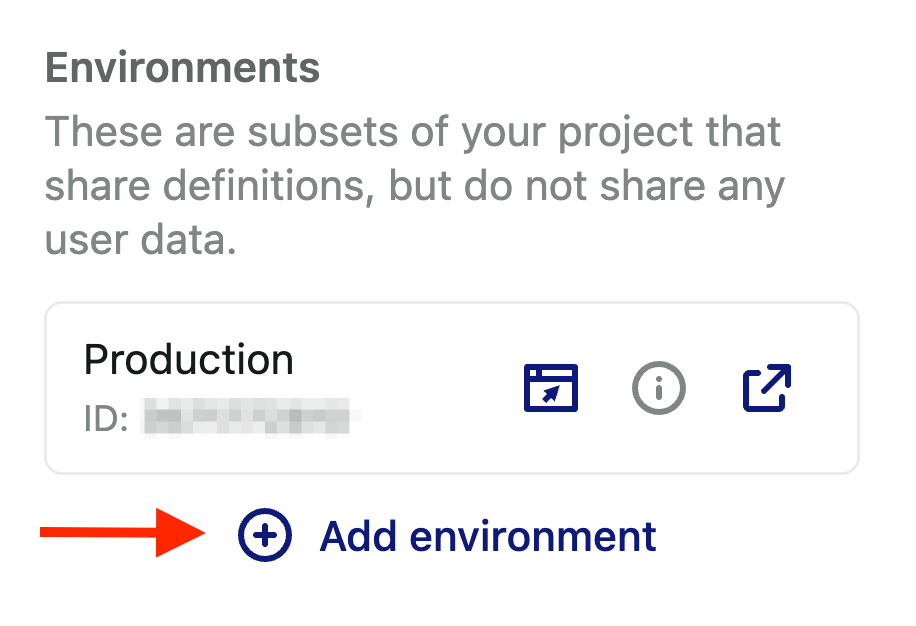
Click into the project you want the environment categorized under, then click the Add Environment button that appears on the project details pane.
To quickly look at charts and data on a different environment, you can change your environment by clicking on the drop-down in the bottom left of the main navigation.
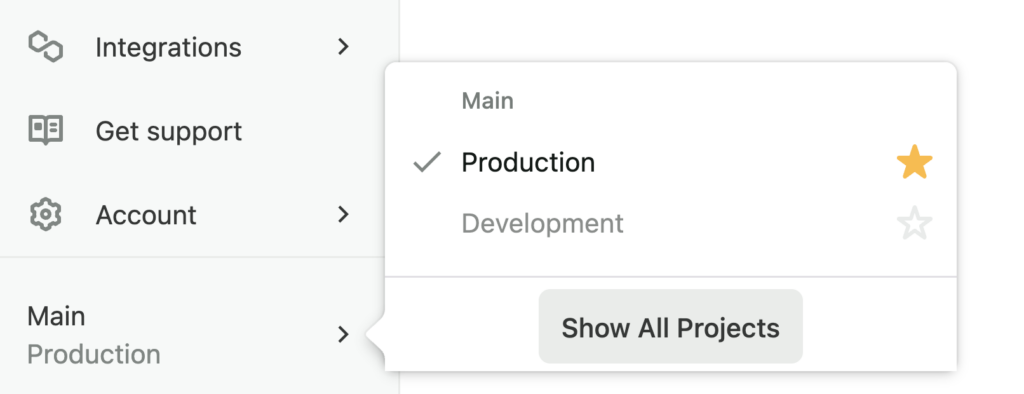
A Production and Development environment is generally enough for most customers. In this setup, we recommend sending all production data from your live application to your Production environment and any testing data to your Development environment. If you happen to have a complex staged deployment process, we recommend creating environments that align with each stage in the process: Local, Integration, Functional, UAT, etc.
As it relates to integration work, the only changes you need to make across environments in your codebase is the environment ID that is used in the Heap installation snippet and any server-side API calls.
Deleting Environments
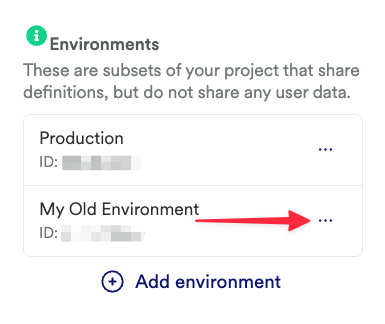
To delete an environment, navigate to Account > Manage > Projects, then click the three dots next to the environment you wish to delete.
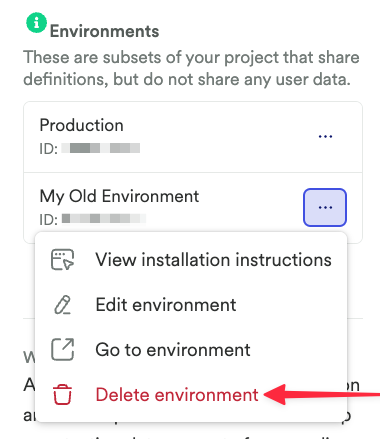
Click the Delete Environment option from the menu that appears.
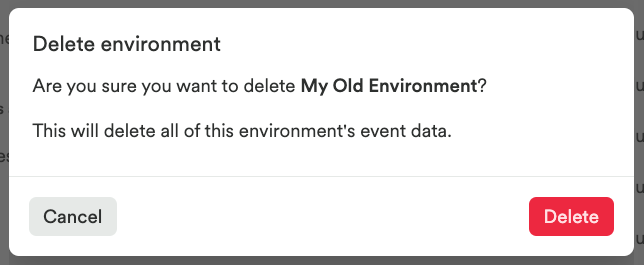
In the pop-up that appears, click the Delete button. This deletes all the data associated with this environment, so proceed with caution!
Starring Environments
Anyone in your Heap account can star environments, including team members in a Read-Only role.
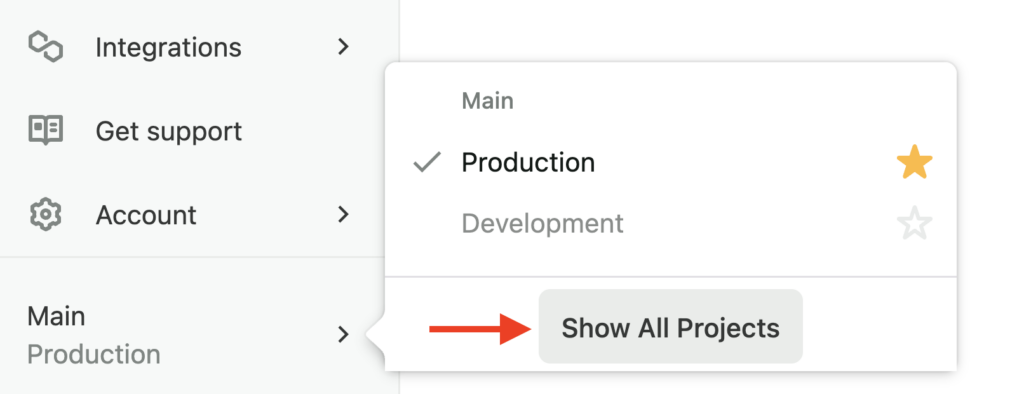
Use stars to favorite the environments that you work in often and quickly jump between them. Any environments that you star will be added to your starred environment view in the environment selector.
To star an environment, click the projects drop-down in the top left, then click the star icon next to an environment.
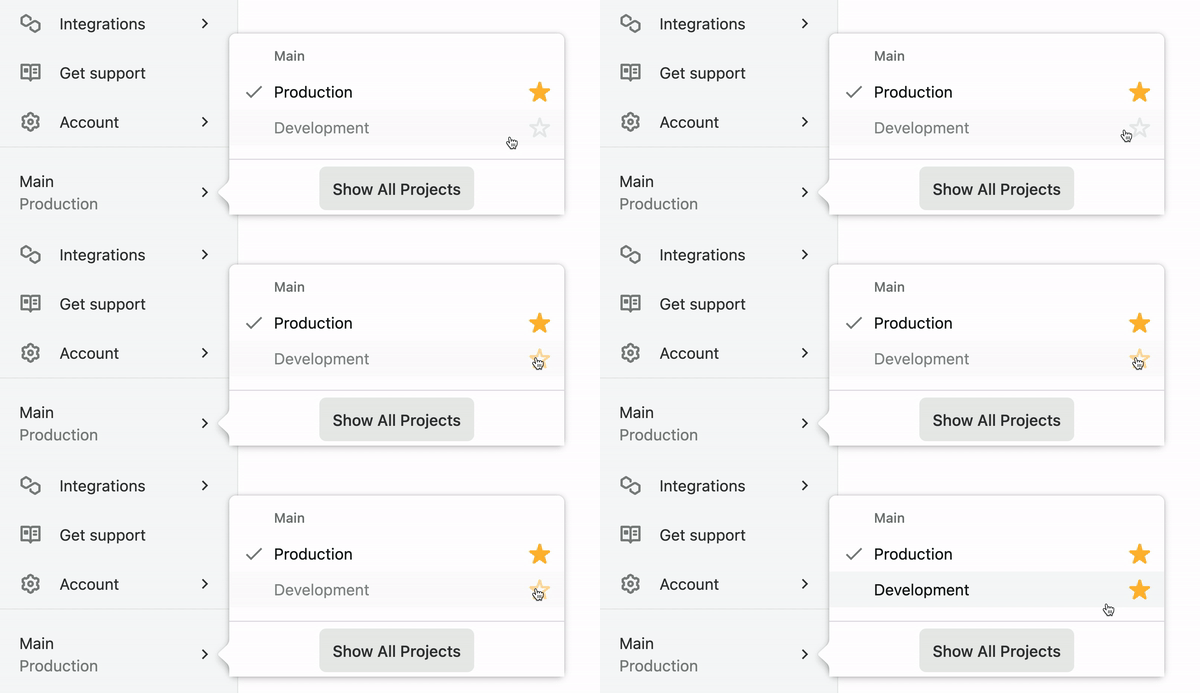
To remove a star, click the star icon again.
Viewing Your Starred Environments
By default, when you have at least one starred environment, you’ll only see your starred environments in the environment selector. If you want to see all of your environments, click the Show All Projects button at the bottom of the environment selector.
