Overview
Security Best Practice
If you use SSO, we strongly recommend that you set up mandatory 2FA for all Heap admins.
To learn more, see enabling mandatory 2FA for your Heap domain.
Azure SSO allows you to manage access and identity for your team by enabling them to access Heap via their Azure sign-in credentials, with no extra passwords needed.
Prerequisites
To set up Azure SSO with Heap, you’ll need to have the following:
- Admin access to your organization’s Heap account
- Application administrative rights in your organization’s Azure account
Note that Heap must enable access to the Heap app in the Azure marketplace for it to appear in your Azure account.
Setup
Once SSO is enabled, it will be enforced as mandatory for all non-Admins in your Heap workspace.
To set up Azure SSO with Heap, complete these steps:
1. Sign in to your Azure management portal via https://portal.azure.com/.
2. Click on Enterprise Applications.
3. If you don’t already have an enterprise app for Heap added, click the New Application button. If you already have your Heap app configured, skip to step 6.
4. On the next page, click non-gallery application.
5. On the create application page, add a name for this application (we used Heap) then click the Create button at the bottom.
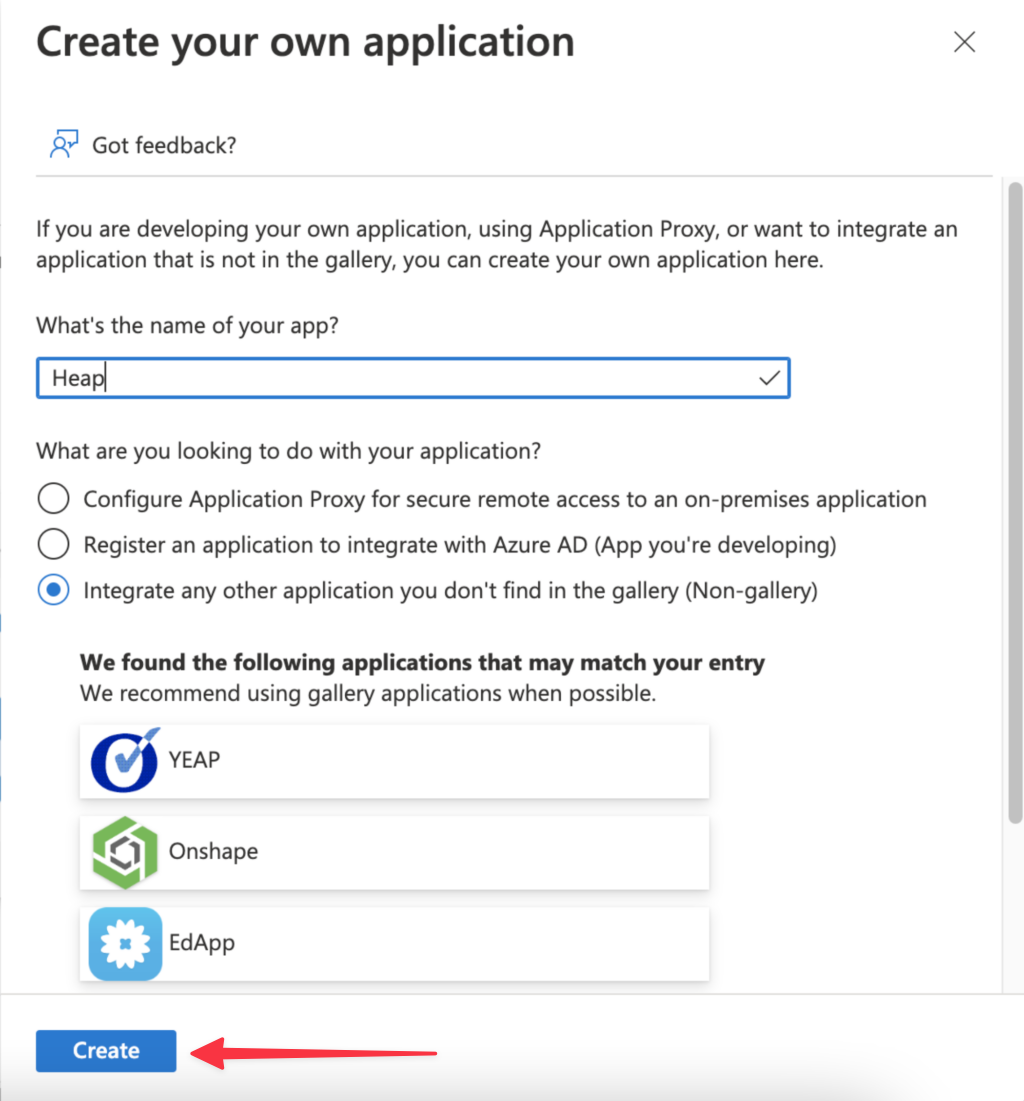
You’ll now see your new Heap app listed on the enterprise applications page.
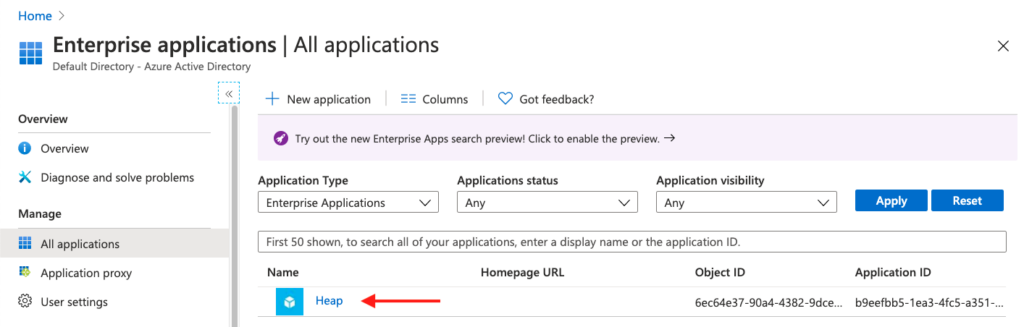
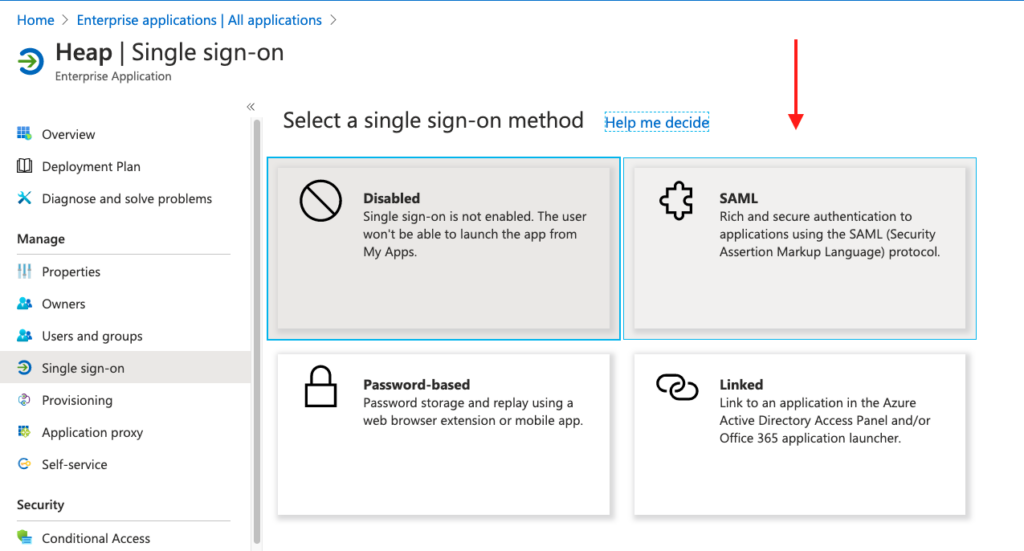
6. Now that you have your app installed, click on the app to open the app page, then click on Single Sign-on in the left navigation bar. On this page, click the SAML box.
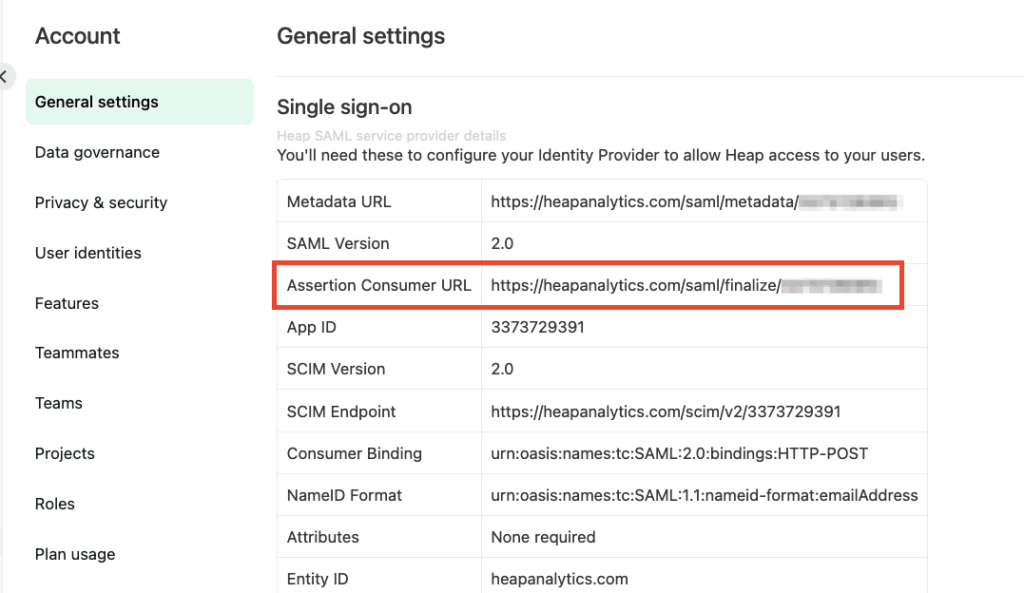
7. Set the Basic SAML Configuration options as follows. You’ll need to find Reply URL in your Heap account:
- Identifier (Entity ID): heapanalytics.com
- Reply URL: https://heapanalytics.com/saml/finalize/<youridhere>

Reply URL is the Assertion Consumer Service URL listed on the Account > Manage > Account settings page in your Heap account.
8. Click the Save icon in Azure to save your settings.
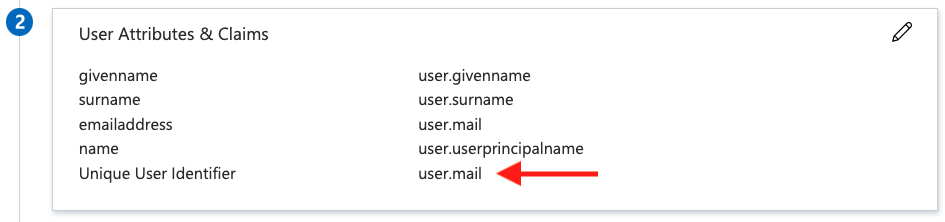
9. In the User Attributes & Claims section, keep all settings as their defaults, except for Unique User Identifier which should be set to user.mail. You may need to edit this setting to update this item.
10. Keep this page open, or copy down the information listed under the Set up section. You’ll need this in a couple of steps.
11. Navigate to the Manage > Properties page in Azure.
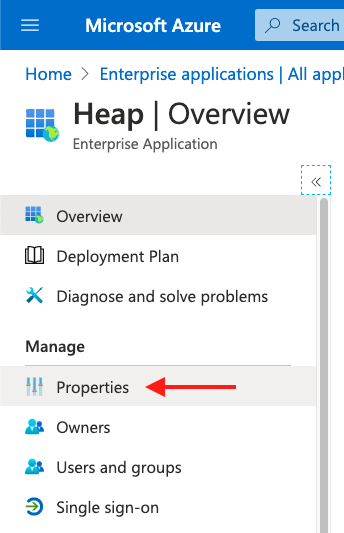
12. (Optional) On this page, make sure the Visible to users toggle is set to No. This means this app won’t be accessible from myapps.microsoft.com, even if they have access within Heap.

Note: If you plan on using an Active Directory group to manage users who have access to Heap, be sure to set ‘User assignment required?’ set to ‘Yes’ on this page.
13. Save this setting to return to the main app page. On this page, click the Set up single sign on box again to return to your Azure SAML settings. You’ll want to have these open to copy-paste information into Heap to complete this setup.
14. Next, open the Heap dashboard in a new tab. Navigate to Account > Settings > Account Settings.
On this page, copy-paste the following information from Azure into Heap:
- Your SAML Identity Provider certificate > Download the base-64 certificate provided by Azure and copy-paste it into this field
- Remote login URL > add the Login URL provided in Azure
- Logout landing URL > add the Logout URL provided in Azure
15. Click the Save Configuration button. You’ll be provided with the option to test this configuration by clicking the Test Configuration button. This will open the Microsoft Azure login page.
You are now able to use your credentials to sign in! Feel free to configure other Azure settings such as custom roles.
Need help? Please post in Community or contact us via the Get support page in Heap.