For access to Heap Connect, contact your Customer Success Manager or sales@heap.io.
Heap Connect lets you directly access your Heap data using SQL in your Redshift warehouse. You can run ad-hoc analyses, connect to BI tools such as Tableau, or join the raw Heap data with your own internal data sources.
Best of all, we automatically keep the data up-to-date and optimize its performance for you. Define an event within the Heap interface, and in just a few hours, you’ll be able to query it retroactively in a clean SQL format.
Note: Currently, we do not sync initial user properties to the users table in Redshift.
Setup
To connect Heap to Redshift, proceed as follows:
1. Create Heap User
To set up Heap to sync to your Redshift cluster, you’ll need to create a user for Heap within the database of choice who at a minimum has CREATE and USAGE privileges. If possible, we do prefer a superuser, as it will help with performance optimization.
We recommend the following cluster settings based on app traffic.
| Monthly Pageviews (estimating from sessions = # of monthly sessions x 10) | Recommended minimum Redshift cluster size | Maximum # of tables to reliably load in under 4 hours |
|---|---|---|
| 300-600M | 64 x dc2.large nodes | 20 |
| 150-300M | 32 x dc2.large nodes | 30 |
| < 75M | 4 x dc2.large nodes | 35 |
| 75-150M | 8 x dc2.large nodes | 35 |
We require access to system pg_table_def. Optimally, we’d also like to have access to stv_partitions to check the remaining disk size (although this is not required).
2. Update Table Permissions
Once the Heap user is created, you’ll need to update permissions for users that access your Redshift cluster by updating the default privileges for tables created by our Heap user in future syncs. Please run the following command as any superuser after creating the Heap user: ALTER DEFAULT PRIVILEGES FOR USER <heap_username> GRANT SELECT ON TABLES TO <target_user/group>
Please note that you’ll need to specify any other permissions you’d like to provide your target users or target group if users require other permissions beyond SELECT for the Heap data.
3. Allowlist Heap IP Address
Additionally, you’ll need to make sure that you’ve allowlisted connections from the following IP address: 52.20.48.42
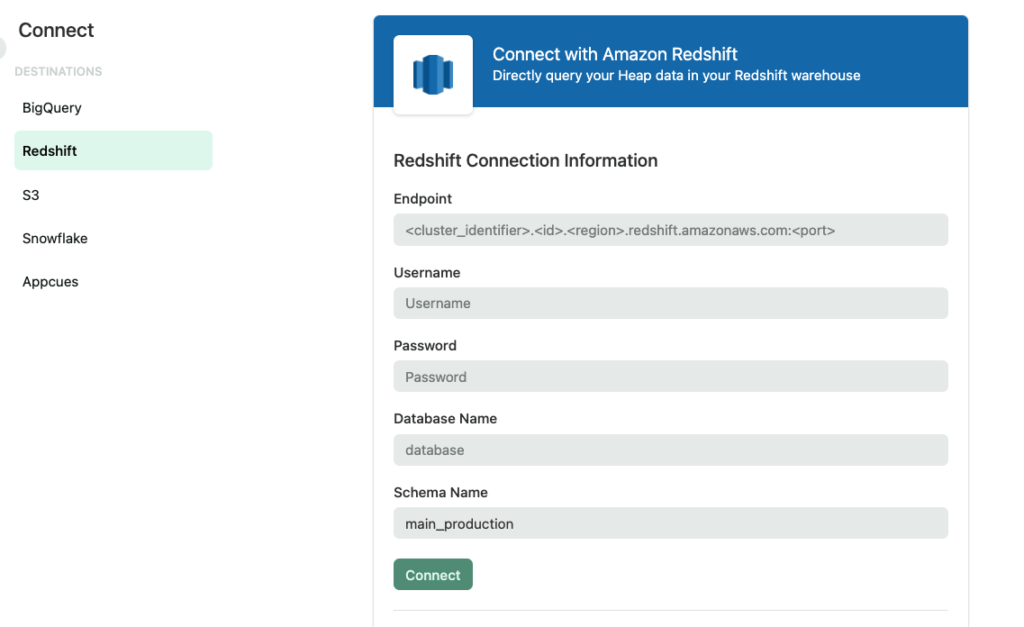
4. Fill in your credentials on the Redshift setup page in Heap
If you have been granted access to Heap Connect and you do not see the setup page, please reach out via the Get support page. You need to know the following information about your Redshift cluster. This information is available on the Redshift configuration page:
- Endpoint (host:port format, port is generally 5439)
UsernamePassword- Database Name
- Schema Name (default to “main_production”)
You can learn more about how the data will be structured upon sync by viewing our docs on data syncing.
Note: It may take up to 24 hours for us to prepare your account for syncing. This is noted in the ‘sync pending’ state.
Note: The schema name defaults to snake-cased _. The name can be changed, but do not specify an existing schema in your database. The Heap schema must be a separate, new schema, that will be created upon initial sync, and no tables or views can be manually added to the Heap schema.
You can sync Defined Properties to this warehouse.
What to expect from your first sync
Once you have successfully configured Redshift, you can see your sync status on the Redshift page in Heap.
How fast you can expect the first sync to occur
The first sync can take up to 48 hours, depending on how much data you have. Subsequent syncs happen every 24 hours. Click the Configuration (gear) icon on the Redshift page to select a sync start time.
Reach out via the Get support page if you have any questions or concerns about your first sync.
What tables you will see downstream
The Redshift connection syncs the Heap data to your downstream connection. By default it syncs 3 data tables (pageviews, users, sessions) and some additional metadata tables like user_migrations and sync_info tables.
How to sync more events downstream
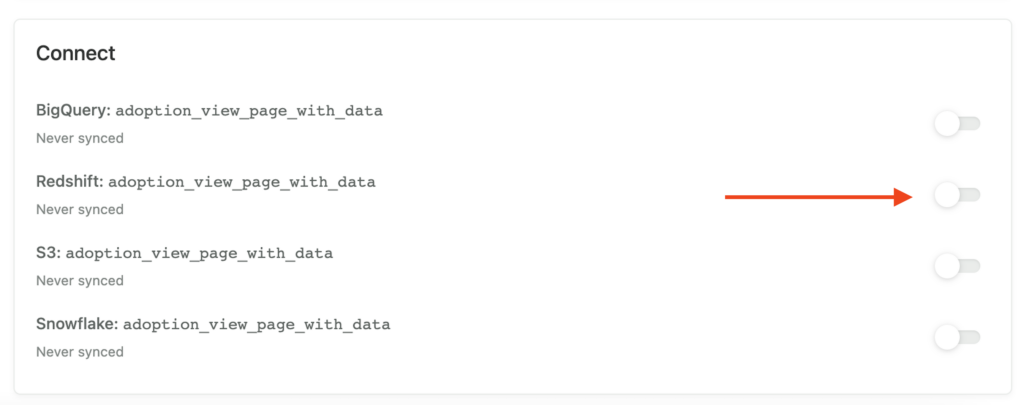
- Go to Data > Labeled events and click on the event you want to sync. Under Connect, select the toggle for Redshift
2. On the pop-up that appears, select either All Time (since the day Heap was installed) or Date To Now. If you click Date To Now, a small calendar will appear where you can select a starting date.

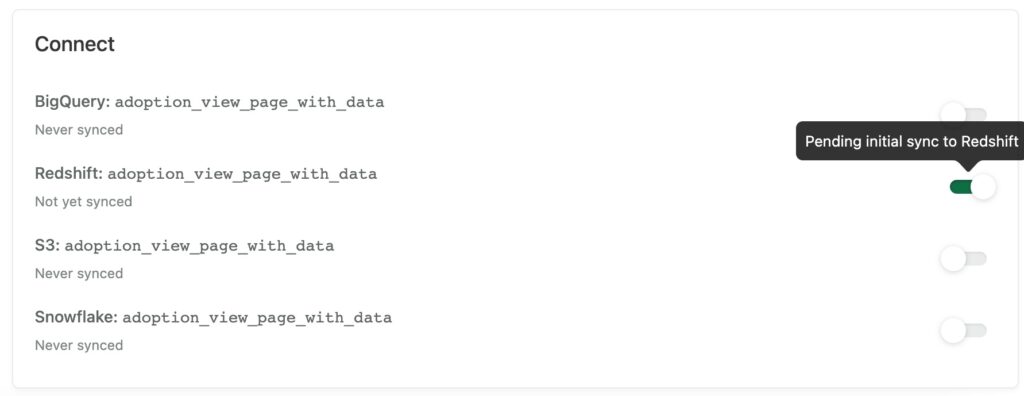
3. The toggle you selected will now be green and read “Pending initial sync to Redshift” when you hover over it. The sync for this event doesn’t happen immediately; it will happen at your next scheduled sync.
Performance Optimization
Under the hood, we tune your Redshift schema to ensure that it is as performant as possible. In particular, this means:
- The sort key on each table is the
timefield. This ensures that recent data gets accessed more quickly than older data. - The distribution key on each table is the
user_idfield. This collocates user and event data for a givenuser_idon the same node slice, which ensures that user level joins between theuserstable and event tables are as performant as possible. - Automatic compression is enabled. This ensures that columnar data is optimally encoded, which reduces disk I/O and improves query performance.
To learn more about concepts such as column compression and node distribution, take a look at the Amazon Redshift docs.
Redshift Permissions Troubleshooting
If you didn’t apply default privileges as part of your Connection Requirements, some users may lose permissions on some tables when:
- An event definition changes (any change except the name)
- A table sync is toggled off and on again (in the Event view or the Heap Connect view)
- Weekly maintenance tasks are run (VACUUM, etc)
Redshift doesn’t currently provide an easy way to re-apply table-level permissions in these cases, so we recommend applying schema-level permissions as part of your setup.
Set Permissions For All Users
Typically, users will have one of two permission sets: ALL and SELECT. You can read more about Redshift permissions in Redshift’s documentation.
To correctly set ALL permissions for your users, run the following three commands on your cluster in the database containing Heap’s schema as a superuser:
GRANT ALL ON SCHEMA {schema_name} TO {comma-separated list of users};
GRANT ALL on ALL TABLES IN SCHEMA {schema_name} TO {comma-separated list of users};
ALTER DEFAULT PRIVILEGES FOR USER {heap_user} GRANT ALL ON TABLES TO {comma-separated list of users};
To correctly set SELECT permissions for your users, run the following three commands on your cluster in the database containing Heap’s schema:
GRANT USAGE ON SCHEMA {schema_name} TO {comma-separated list of users};
GRANT SELECT on ALL TABLES IN SCHEMA {schema_name} TO {comma-separated list of users};
ALTER DEFAULT PRIVILEGES FOR USER {heap_user} GRANT SELECT ON TABLES TO {comma-separated list of users};
This should ensure that the correct permissions persist when we drop and recreate tables. Please contact us via the Get support page if you have any questions.