Overview
Marketo is marketing automation software that provides inbound marketing, social marketing, CRM, and other related services. The Heap Marketo integration is bi-directional:
- Automatically capture interesting moments from Marketo as events in Heap (open email, send email, etc)
- Send behavioral data into Marketo as static lists to run email campaigns or change lead scores
With Heap’s Marketo source, you’ll be able to answer:
- How do users that open your recent feature blast go on to interact with your product?
- How many email touches does it take to properly nurture a lead to signup?
- How do your email campaigns influence customer engagement and retention?
Source
Setup
This guide provides setup instructions for the Marketo integration with Heap, including information on the payout and PII-free payload.
You will need to partner with your Marketo admin and Heap Support to complete the setup steps listed in this section.
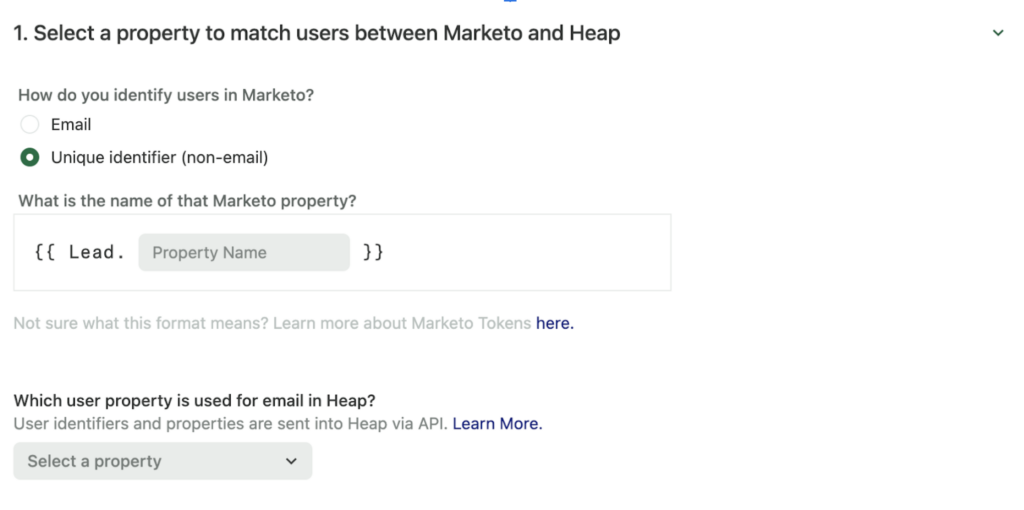
Step 1: Select a property to match users between Marketo and Heap
Navigate to Integrations > Directory > Marketo and on the Data In card click the Set Up button. You will be prompted to select a user property to link data across Heap and Marketo. You can select email addresses or a custom ID property that exists in Heap and Marketo.
Join Key Required
You need a user property to match data across the same user in Heap and this source. This property can be set to identity or any custom user property in Heap.
Make sure that the value of the property you choose is unique to each user. For example, email address is a typical join key because each user should have their own unique email address. You can use any two IDs that match.
You will need to use Heap’s APIs if you don’t have this kind of property set up or if you are not currently sending email addresses into Heap. Learn more about attaching custom data to users via Heap’s API here.
Need help? Please post in Community or contact us via the Get support page in Heap.
If you choose a custom ID property, make sure to input the correct name of the property in Marketo, and make sure the values of this property match the Heap property you select. Marketo properties are called tokens. If you aren’t sure which property is correct, confirm the name of the token with your Marketo admin.
Next, you’ll need to go to Marketo to finish setup.
Step 2: Create the webhook in Marketo
You’ll need admin privileges in Marketo to complete this step.
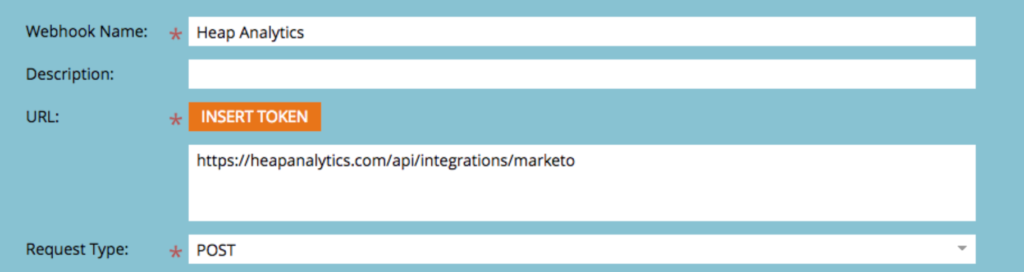
In your Marketo account, create a Heap Webhook as follows:
- Navigate to Admin, then select Integration > Webhooks > New Webhook
- Provide a Webhook Name, such as Heap
- Set the URL as https://heapanalytics.com/api/integrations/marketo
- Set the Request Type as POST
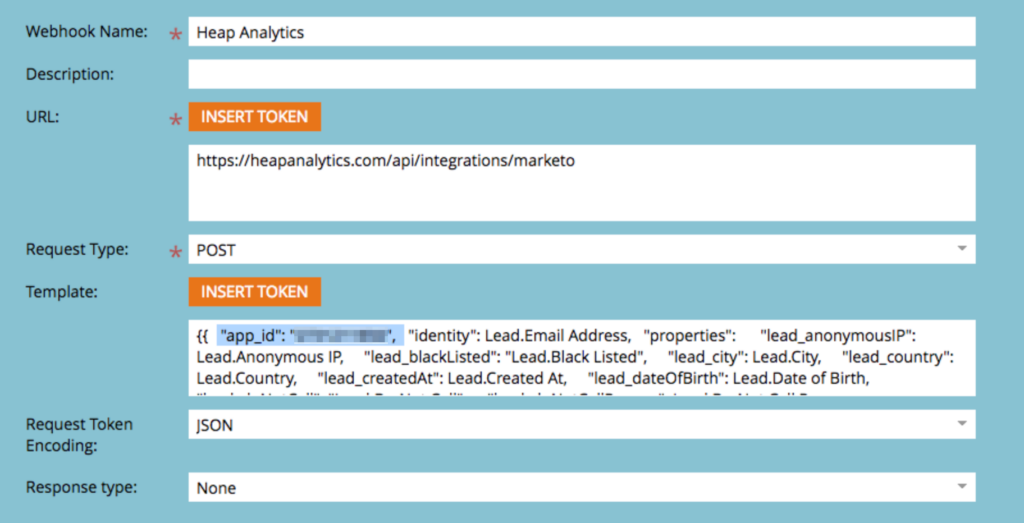
Add Payload or PII-Free Payload Template
We provide two types of templates: a full template and a PII-free template. The template you choose determines what Marketo properties get sent to Heap. We recommend using the PII-free payload if you don’t want to send any personally identifiable information to Heap.
Copy the appropriate template below and add it to the webhook configuration in Marketo.
You’re welcome to customize the templates and modify the tokens used in the request, but the following fields should never be removed: app_id, identity, and trigger_trigger_name.
You’ll need to change the app ID in the template to your own application ID, which you can find in Heap under Account > Manage > Projects. We recommend testing this in your development environment first, then confirming the setup within Heap.
Full template
The full payload example below sends over all non-custom tokens used by Marketo.
The identifier mapped to identity must match values of a user property or identity in your Heap account. The example below assumes an email property has been chosen in step 1.
{
  "app_id": "123456789",  // CHANGE TO YOUR OWN APP ID
  "identity": {{Lead.Email Address}},
  "properties": {
    "trigger_trigger_name": {{trigger.Trigger Name}},
    "lead_anonymousIP": {{Lead.Anonymous IP}},
    "lead_blackListed": {{Lead.Black Listed}},
    "lead_city": {{Lead.City}},
    "lead_country": {{Lead.Country}},
    "lead_createdAt": {{Lead.Created At}},
    "lead_dateOfBirth": {{Lead.Date of Birth}},
    "lead_doNotCall": {{Lead.Do Not Call}},
    "lead_doNotCallReason": {{Lead.Do Not Call Reason}},
    "lead_email": {{Lead.Email Address}},
    "lead_emailInvalid": {{Lead.Email Invalid}},
    "lead_emailInvalidCause": {{Lead.Email Invalid Cause}},
    "lead_fax": {{Lead.Fax Number}},
    "lead_firstName": {{Lead.First Name}},
    "lead_fullName": {{Lead.Full Name}},
    "lead_inferredCity": {{Lead.Inferred City}},
    "lead_InferredCompany": {{Lead.Inferred Company}},
    "lead_inferredCompany": {{Lead.Inferred Country}},
    "lead_inferredMetropolitanArea": {{Lead.Inferred Metropolitan Area}},
    "lead_inferredPhoneAreaCode": {{Lead.Inferred Phone Area Code}},
    "lead_inferredPostalCode": {{Lead.Inferred Postal Code}},
    "lead_inferredStateRegion": {{Lead.Inferred State Region}},
    "lead_mktoIsCustomer": {{Lead.Is Customer}},
    "lead_isEmployee": {{Lead.Is Employee}},
    "lead_mktoIsPartner": {{Lead.Is Partner}},
    "lead_title": {{Lead.Job Title}},
    "lead_lastName": {{Lead.Last Name}},
    "lead_leadSource": {{Lead.Lead Source}},
    "lead_marketingSuspended": {{Lead.Marketing Suspended}},
    "lead_middleName": {{Lead.Middle Name}},
    "lead_mobilePhone": {{Lead.Mobile Phone Number}},
    "lead_originalReferrer": {{Lead.Original Referrer}},
    "lead_originalSearchEngine": {{Lead.Original Search Engine}},
    "lead_originalSearchPhrase": {{Lead.Original Search Phrase}},
    "lead_originalSourceInfo": {{Lead.Original Source Info}},
    "lead_originalSourceType": {{Lead.Original Source Type}},
    "lead_mktoPersonNotes": {{Lead.Person Notes}},
    "lead_phone": {{Lead.Phone Number}},
    "lead_registrationSourceInfo": {{Lead.Registration Source Info}},
    "lead_registrationSourceType": {{Lead.Registration Source Type}},
    "lead_salutation": {{Lead.Salutation}},
    "lead_unsubscribed": {{Lead.Unsubscribed}},
    "lead_unsubscribedReason": {{Lead.Unsubscribed Reason}},
    "lead_updatedAt": {{Lead.Updated At}},
    "company_account_owner_email_address": {{Company.Account Owner Email Address}},
    "company_address": {{Company.Address}},
    "company_annual_revenue": {{Company.Annual Revenue}},
    "company_city": {{Company.City}},
    "company_company_name": {{Company.Company Name}},
    "company_company_notes": {{Company.Company Notes}},
    "company_country": {{Company.Country}},
    "company_industry": {{Company.Industry}},
    "company_main_phone": {{Company.Main Phone}},
    "company_num_employees": {{Company.Num Employees}},
    "campaign_name": {{campaign.name}},
    "campaign_id": {{campaign.id}},
    "campaign_description": {{campaign.description}},
    "trigger_name": {{trigger.Name}},
    "trigger_link": {{trigger.Link}},
    "trigger_subject": {{trigger.Subject}},
    "trigger_category": {{trigger.Category}},
    "trigger_details": {{trigger.Details}},
    "trigger_web_page": {{trigger.Web Page}},
    "trigger_sent_by": {{trigger.Sent By}},
    "trigger_referrer": {{trigger.Referrer}},
    "trigger_search_engine": {{trigger.Search Engine}},
    "trigger_search_query": {{trigger.Search Query}}
    }
}
PII-free template
If you can’t send personally identifiable information to Heap, you can use the example below for a PII-free payload.
The custom identifier mapped to identity must match a user property or identity in your Heap account. The format is {{ Object.Field Name }}.
{
  "app_id": "123456789", // CHANGE TO YOUR OWN APP ID
  "identity": {{Object.Field Name}},
  "properties": {
    "campaign_name": {{campaign.name}},
    "campaign_id": {{campaign.id}},
    "campaign_description": {{campaign.description}},
    "trigger_trigger_name": {{trigger.Trigger Name}},
    "trigger_name": {{trigger.Name}},
    "trigger_link": {{trigger.Link}},
    "trigger_subject": {{trigger.Subject}},
    "trigger_category": {{trigger.Category}},
    "trigger_details": {{trigger.Details}},
    "trigger_web_page": {{trigger.Web Page}},
    "trigger_sent_by": {{trigger.Sent By}},
    "trigger_referrer": {{trigger.Referrer}},
    "trigger_search_engine": {{trigger.Search Engine}},
    "trigger_search_query": {{trigger.Search Query}}
    }
}
Customizing the Template
You can include custom properties from your Marketo instance by adding them to the payload.
For user properties, the key should be lead_ or company_ (as applicable), followed by the REST API name of the property, and the value should be the token variable for that field.
For event properties, the key should be trigger_ followed by the REST API name of the property, and the value should be the token variable for that field.
Learn more about Marketo tokens via Marketo’s Tokens Overview.
Set Request Token & Response Type
Specify the Request Token Encoding as JSON and the Response Type as None.

Click Create to finish creating your webhook. In the finished view, click Webhook Actions > Set Custom Header and apply the header Content-type with the value of application/json.
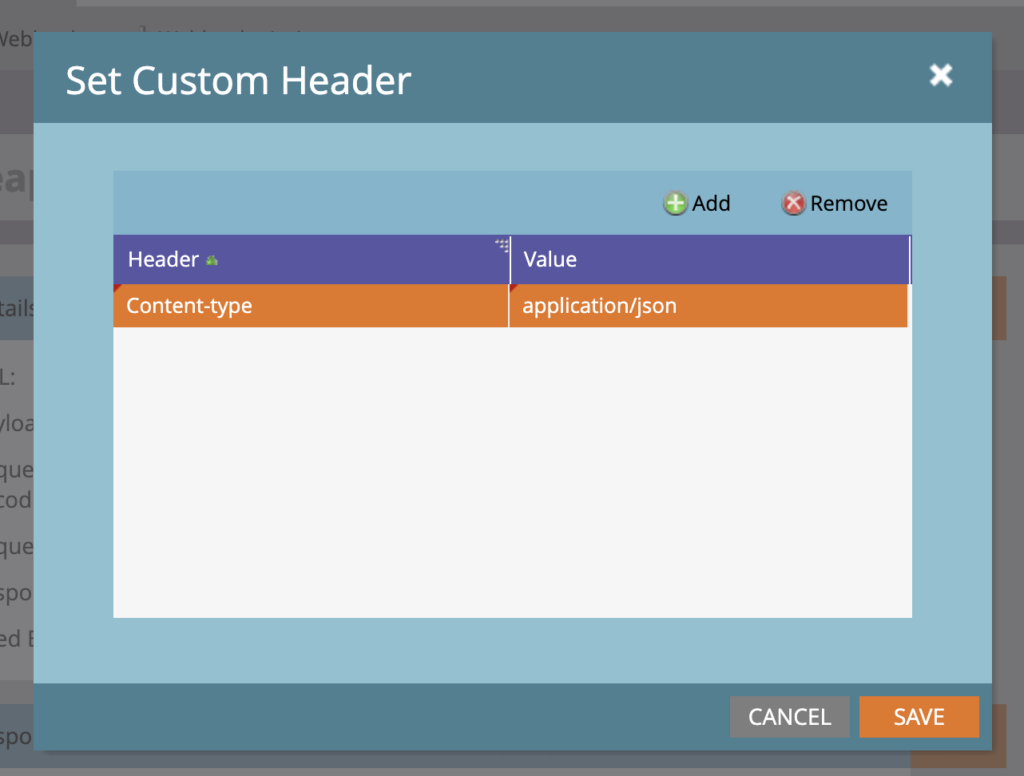
Click Save.
Step 3: Create a New Smart Campaign
Visit Marketing Activities and select New > New Smart Campaign. We suggest putting it in the default Data Management folder and giving it a name like Heap.
Add Triggers for the Smart Campaign
Next, select Smart List and define the triggers desired. You can determine which triggers you’d like to send events to Heap based off of and the filters that you’d like to base them on, but we recommend sending as much data as possible. In particular, you’ll want to send the following most likely:
  * `Clicks Link in Email`
    - `Email is any`
  * `Unsubscribes from Email`
    - `Email is any`
  * `Sent Forward to Friend Email`
    - `Email is any`
  * `Opens Email`
    - `Email is any`
  * `Email is Delivered`
    - `Email is any`
  * `Email Bounces Soft`
   - `Email is any`
  * `Email Bounces`
    - `Email is any`
  * `Open Sales Email`
    - `Subject is any`
  * `Is Sent Sales Email`
    - `Subject is any`
  * `Lead is created`
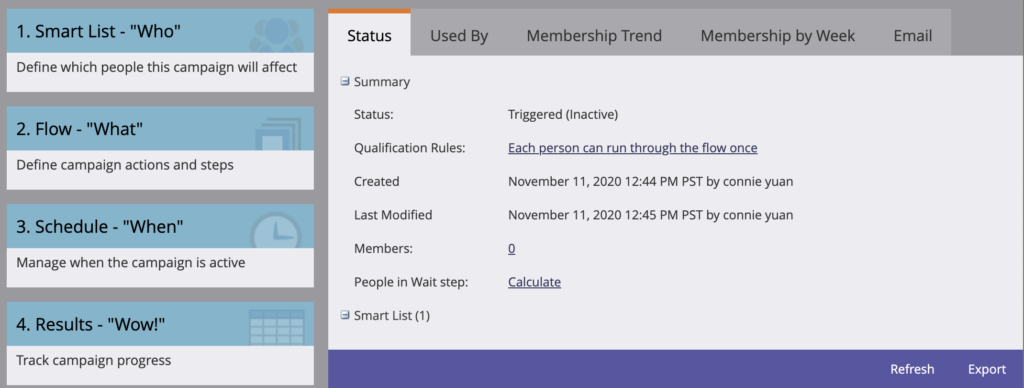
Review the Qualification Rules
As a best practice, we recommend reviewing the Smart Campaign Qualification Rules after creating your Smart Campaign. Sometimes, the default setting will be that a user may trigger the Smart Campaign (and thus the webhook to Heap) “only once”. This should be changed to “every time” so that Heap ingests a Marketo event every time that a user triggers the Smart Campaign. Simple instructions to do this can be found in Marketo’s documentation on Qualification Rules.
Link Webhook to the Flow
From the same page, select Flow and drag Integration > Call Webhook from the right-hand column and specify it as the first step in the flow. Specify the Webhook as the Heap webhook.
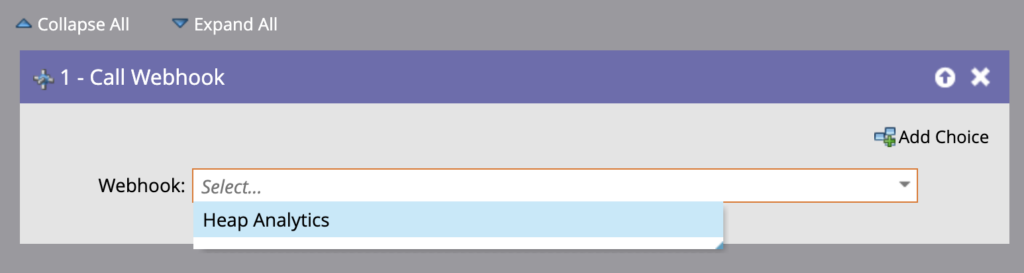
Once the above has been completed, visit Schedule and select Activate to activate this campaign.
Once the integration is enabled, test the data feed into Heap via Live View. Assuming everything has been configured properly, you’ll start seeing custom events populated in Heap with events titled based on the Trigger Name in Marketo.
Data Format
Once enabled, Heap will automatically ingest all Marketo interesting moments as events within the Marketo source. The event types in Heap map to the trigger name in Marketo.
User Properties
Once enabled, Heap will automatically captures all user properties according to the payload set above. We also support custom fields. If you have custom fields with important data, please reach out to support@heap.io with details.
Destination (Marketo Data Connector)
This integration allows you to send Heap segments into Marketo as a static list, updated every 4 hours.
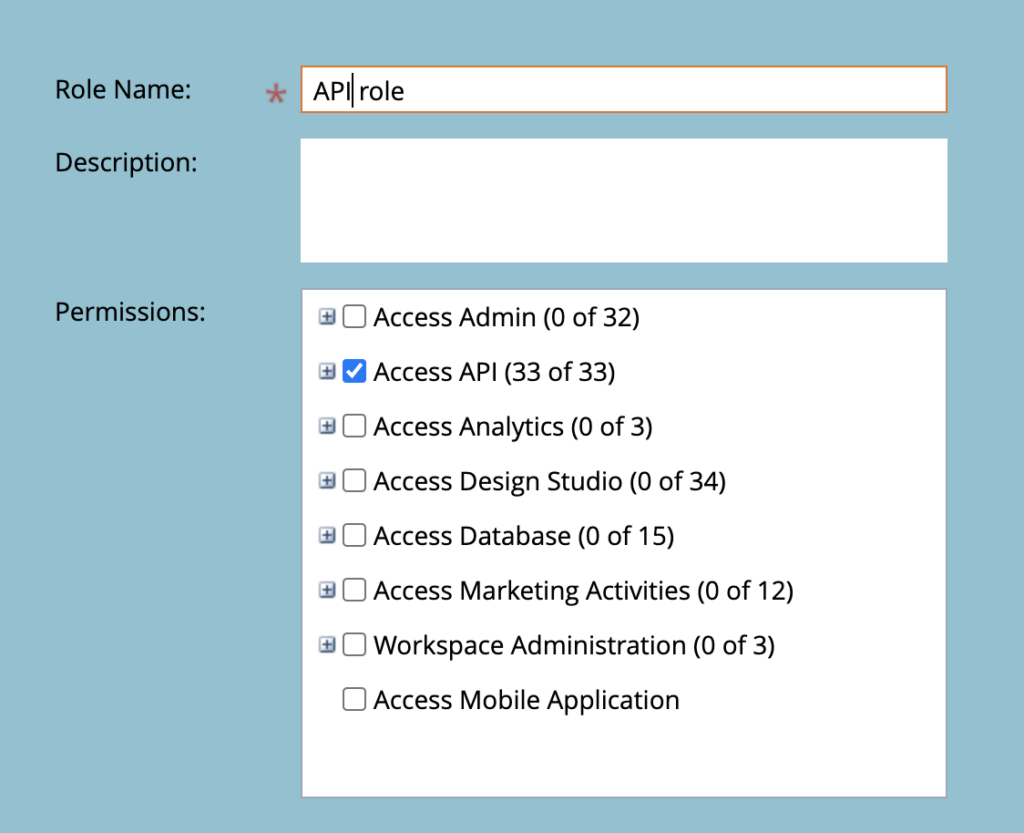
Step 1: Create an API Only user and Assign API Role in Marketo (Marketo Admin Step)
You’ll need the user to create a LaunchPoint in step 2. The role assigned should have the Access API permissions:
Step 2: Create a LaunchPoint and Get Credentials from Marketo (Marketo Admin Step)
Log into Marketo and navigate to Admin > Integration > Web Services.
Create a new service and set the API Only user from step 1:
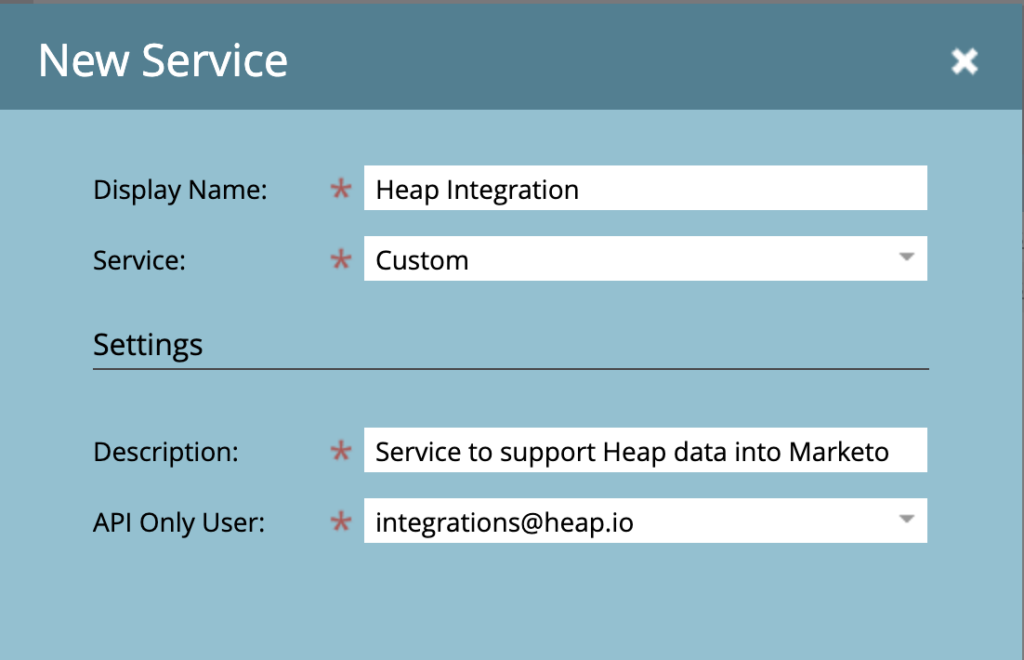
After you save the service, click “view details” and copy the client ID and client secret for the next step:
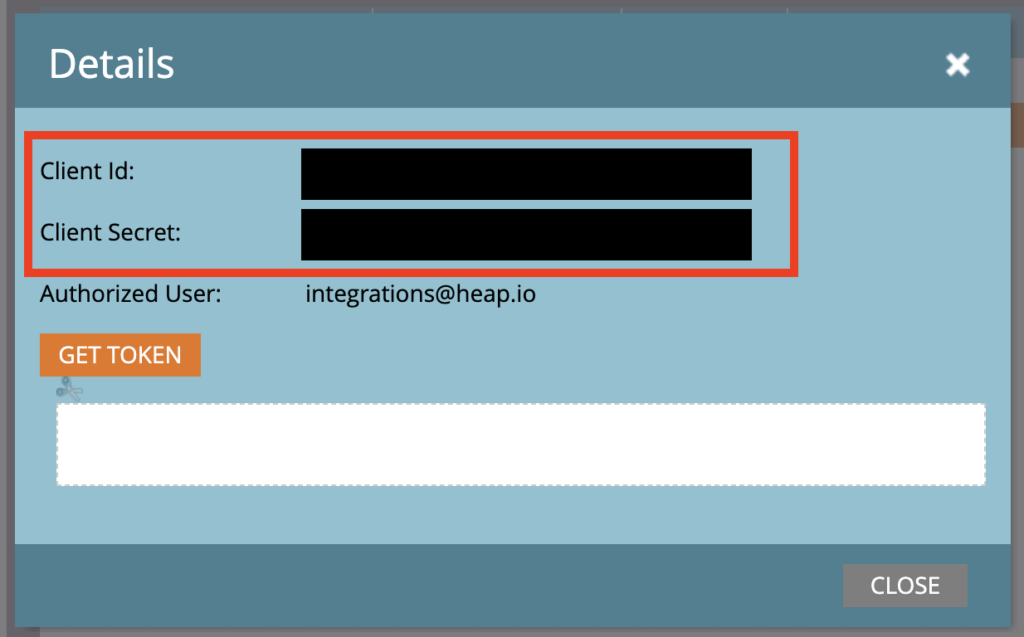
You’ll also need the Rest URL for the next step, which you can get under Admin > Integration > Web Services > Rest API Endpoint.
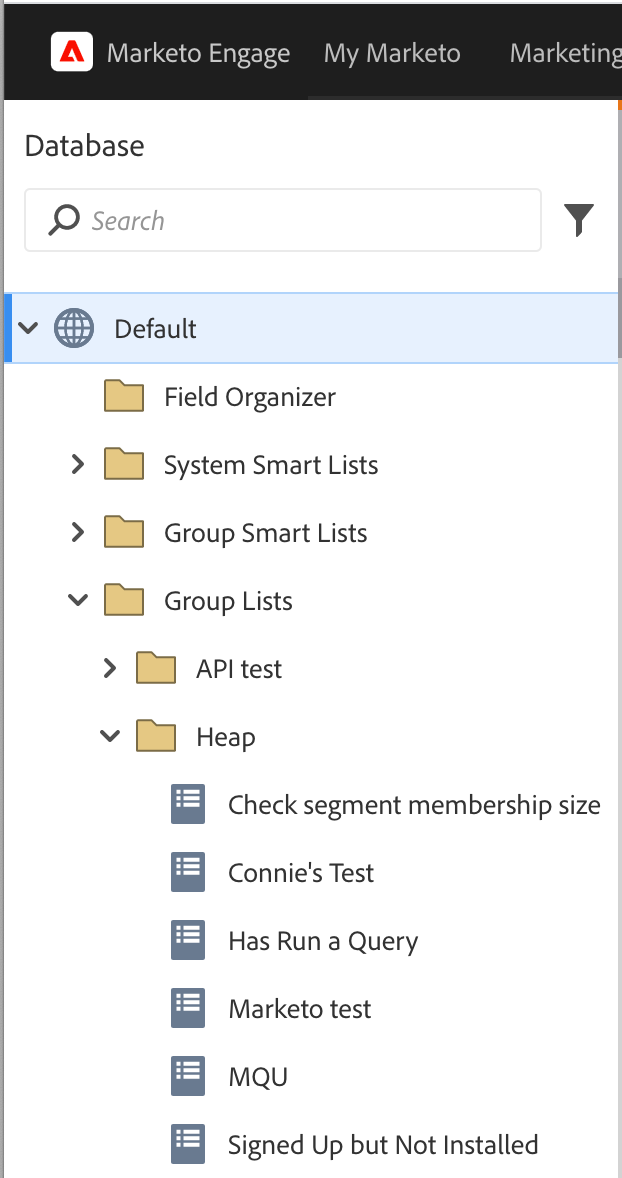
Step 3: Verify folder path
Verify that the folder path Default > Group Lists exists in your Marketo database. This is important because the Heap integration will create a “Heap” folder under the Group Lists folder that contains all synced segments. If the above path does not exist, the sync will fail.
Step 4: Configure Access in Heap
Admin or Architect role required
You must have an Admin or Architect role in Heap to perform this step.
In Heap, navigate to Integrations > Directory > Marketo. In the Data Out section, you will see either an option to Set Up or Contact Us. If you see Contact Us, reach out to your Customer Success Manager to enable this feature for your account.
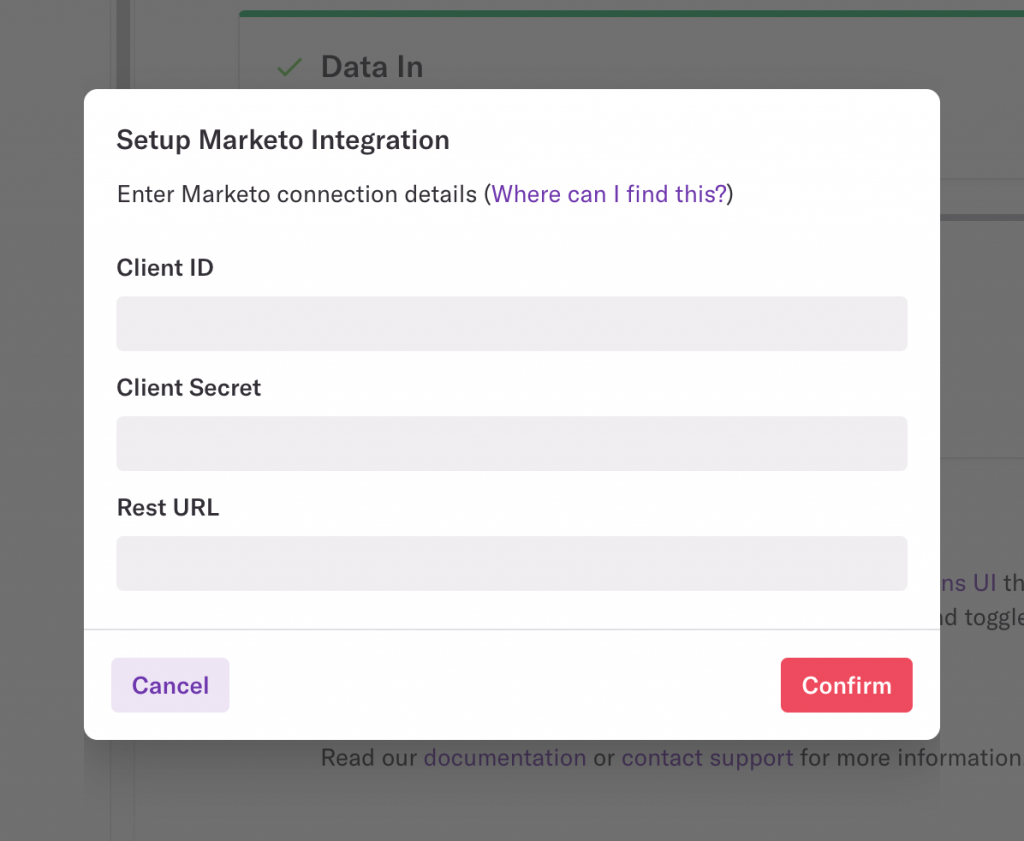
Step 4: Set Join Key for Data Connector
You’ll need to input the Client ID, Client Secret, and REST URL generated from Marketo. Once copied over, click Confirm.
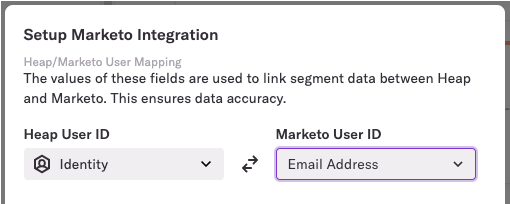
You’ll be prompted to select the Heap User ID and Marketo User ID to map users between the two platforms. This is typically the user’s email address, though you can use any IDs that match.
Once you click Confirm, the Data Out section will show as connected on the Marketo page.

Step 5: Send Segment to Marketo
Analyst role or above required
You must have an Analyst, Architect, or Admin role to sync segments to Marketo.
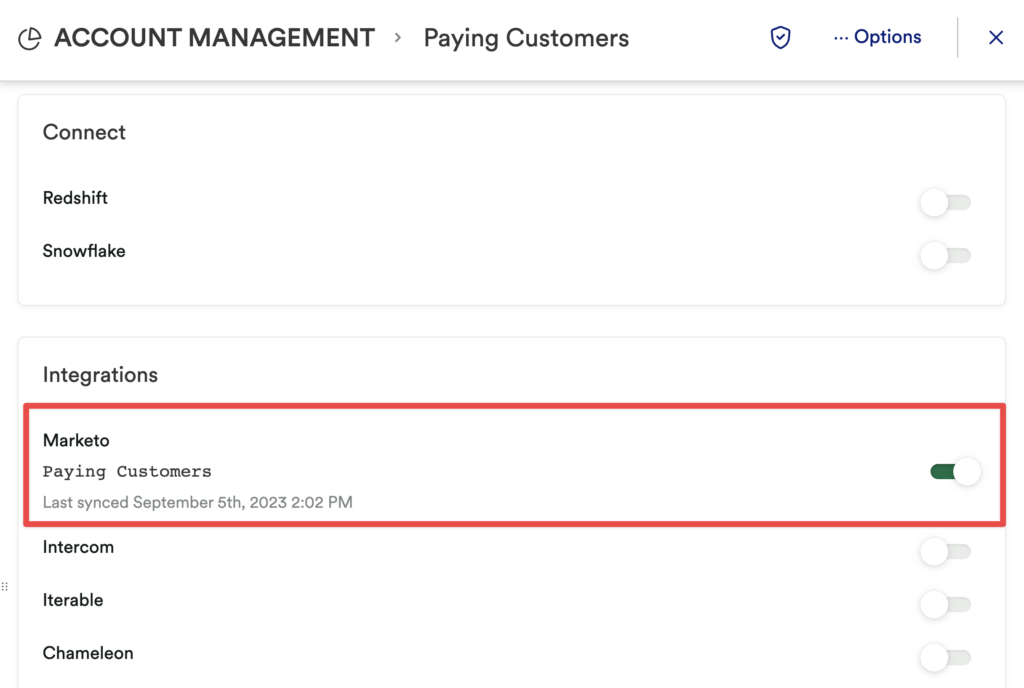
Navigate to Data > Segments in Heap and select the segment you want to send to Marketo. In the segment details view, scroll down to Integrations and you’ll see a toggle to enable this segment. We only allow you to have 30 segments recurrently syncing to Marketo at one time. This segment will sync every 4 hours after it’s enabled.
Step 6: View Synced Heap Segments and Use in Campaigns
You’re now set up to use Heap segments in Marketo lists! Note that the Marketo lists have the exact same name as the segment that is set up in Heap, and that it will be made available as a system list in Marketo.
Frequently Asked Questions (FAQs)
If a user syncs a segment and then deletes the segment, what happens to that segment in Marketo? does it still count against the max # of segments they can sync?
The list remains in Marketo, but it will stop being updated. it doesn’t count against the max number of segments you can sync.
If a user unsyncs a segment, does that list still live in Marketo?
Yes.
If a users changes the name or category of a segment, is that change reflected in Marketo? Do we make new lists with the new names? If so, does that break the campaign flows that depend on the old list?
No the change isn’t reflected in Marketo. The Marketo list name is in the segment detail view.
How does the data sync to Marketo, and will it cause stability issues in Marketo?
We sync the data in batches to Marketo and only send the delta users (users who have entered or left a segment since the last sync) which limits the number of API calls we need.
I’m not seeing Marketo data from the forms on my site.
The data we receive from this integration comes from trigger smart campaigns in Marketo, which call Heap via their webhook functionality and which are seen as a Call Webhook activity type.
Data submitted via forms on your site do not typically come through Marketo in this form, so you’ll need to use our APIs to capture additional metadata on the form page.